


1. When selecting a file from among the files already registered, or selecting a random
file from the schedule registration window, the file is selected as a schedule file
through the library registration procedures.
2. When selecting an image file for the schedule file, you can add background music
from among the following music files. If a schedule file is not an image file, the
add/delete button for the background music is not activated.
z
Storage (Local/USB) : Registering the Storage (Local/USB) File Schedule
You can select a file from among the local storage of the monitor, or from the USB
connected to the monitor to register the selected file with the schedule.
1. From the monitor list, select a monitor where the schedule is to be registered.
The add/delete button of the schedule file is only activated when selecting a monitor
that is currently connected to the server.
2. You can add a file from the local storage device of the monitor, or from the USB
connected to the monitor by pressing the add button. In this case, it will not go
through the library registration procedures on the server.
z
Input/Power : Registering the Input/Power Schedule
You can register the input source or Power Off for the monitor with the schedule.
1. You can schedule a change of the output source or the power for the monitor.
2. After selecting a monitor where the schedule is to be registered in the monitor list,
select an input source or Power Off from the Input/Power Selection.
3. Set the schedule time and press the confirm button.
It will change into the registered output source at the start of the schedule,
and it will correctly return to the MagicNet Menu screen when the schedule is over.
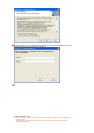
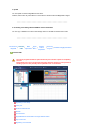
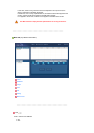
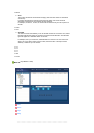
1.
Selecting a Monitor
Selecting either all monitors or a specific monitor, where the schedule will be added to, is
available from among the monitors connected via the network.
2.
Schedule a File Add/Delete
You can select, add or delete the file to be added to the schedule.
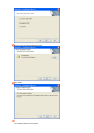
3.
Schedule
{
Start Time
This means the starting time of a schedule, which can be entered in
years/months/days/Hour/Minute. It is possible to set the start time of a schedule within 7
days of the current day, however setting a time later than 7 days from now is not
available.
{
Total Run Time
The total period of time reserved in the schedule
{
Repeat Function
In repeating the schedule at an interval of a day/week/month, select the interval
to be repeated and the date for completing the repeat. The end date of such a
repetition can be set within 1 year of the current date.
If you do not select the repeat option or do not select the end date of the
repetition, the schedule will be added once by default.
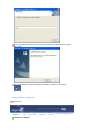
4.
Options
{
Insert between Existing Schedules
This means that a new time schedule is added without affecting the total playing
time of the old schedule.
If the start time of the new schedule overlaps with the end time of the old one, the
start time of the new schedule is adjusted to after the end of the old one.
If the end time overlaps with the start time, it will be adjusted to before the start
time.
{
Ignore/Overwrite Existing Schedules
Existing schedules are ignored, and a new user schedule overwrites at the required
time. If the new schedule overlaps with an existing schedule, the time of the existing
schedule can be changed or even be deleted, since it is overwritten by the new
schedule.