


Scanning_43
11. Scanning begins.
Setting scan information in Samsung Scan Manager.
You can find out about Samsung Scan Manager program information and
installed scan driver's condition. Also, you can change scan settings and
add or delete the folders where scanned documents to computer are save in
Samsung Scan Manager program.
1. Press Start>Control Panel> Samsung Scan Manager.
Samsung Scan Manager Administration appears.
2. Select the appropriate machine from the Samsung Scan Manager.
3. Press Scan Property.
4. Set Scan Button allows you to change the saving destination and scan
settings, add or delete application program and format files.
You can change the scanning machine by using Change Port. (Local or
Network)
5. Press OK after setting is done.
SCANNING BY A NETWORK CONNECTION
If you have connected your machine to a network and set up the network
parameters correctly, you can scan and send images over the network.
Preparing for network scanning
Before using your machine’s network scanning features, you need to
configure the following settings, depending on your scan destination:
• Register as an authorized user for scanning to email, FTP, or SMB
• Set up the SMTP server for scanning to email
• Set up the FTP servers for scanning to FTP
• Set up the SMB servers for scanning to SMB
User authentication for network scanning
To send an email, FTP, SMB or Network, you must register authorized
local or network users using SyncThru™ Web Service.
• If user authentication has been activated, only authorized local users
or on the DB server (SMB, LDAP, Kerberos) can send scanned data
to the network (email, FTP, SMB, Network).
• For network scanning using the authentication feature, you must
register the network or local authentication configuration using the
SyncThru™ Web Service.
• User authentication has 3 options: none (Default), network
authentication, and local authentication.
Registering local authorized users
1. Enter your machine’s IP address as the URL in a browser and click
Go to access the web site of your machine.
2. Click Machine Settings.
3. Select Local Authentication on the General Setup of the User
Authentication web page.
4. Click Add.
5. Select an index number corresponding to the location for storing the
entry, from 1 to 50.
6. Enter your name, auth ID, password, e-mail address and phone
number.
You need to enter the registered user ID and password in the
machine when you start scanning to email from the control panel.
7. Click Apply.
Register authorized network users
1. Enter your machine’s IP address as the URL in a browser and click
Go to access the web site of your machine.
2. Click Machine Settings.
3. Select Network Authentication on the General Setup of User
Authentication web page.
4. Click Apply and OK.
5. Select the Authentication Type that you prefer.
6. Configure the values for each feature, as follows.
7. Click Apply.
Network user authenticated by Kerberos
1. Enter the realm used for Kerberos login.
2. Select IP Address or Host Name.
3. Enter the IP address in dotted decimal notation or as a host name.
4. Enter the server port number, from 1 to 65535.
The default port number is 88.
5. You can add a backup domain as a previous step.
6. Click Apply.
Network user authorized by SMB
1. Enter the domain that is used for SMB login.
2. Select IP Address or Host Name.
3. Enter the IP address in dotted decimal notation or as a host name.
4. Enter the server port number, from 1 to 65535.
The default port number is 139.
5. You can add a backup domain as a previous step.
6. Click Apply.
Network authorized user by LDAP
1. Enter your machine’s IP address as the URL in a browser and click
Go to access the web site of your machine.
2. Click Machine Settings and LDAP Server Setup.
3. Select IP Address or Host Name.
4. Enter the IP address in dotted decimal notation or as a host name.
5. Enter the server port number, from 1 to 65535.
The default port number is 389.
6. Enter Search Root Directory, the top search level of the LDAP
directory tree.
7. Select Authentication method. Two options for LDAP server login.
Anonymous:This is used to bind with null password and login ID
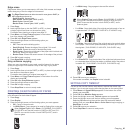
• Scanned image is saved in computer's My Documents> My
Pictures>Samsung folder.
• You can use Tawin driver to scan quickly in Samsung Scan
Manager program.
• You can also scan by pressing Window's Start>Control
Panel> Samsung Scan Manager>Quick Scan.
Scan Manager program can only be used in the Window system.
You can open Samsung Scan Manager by pressing the Smart
Panel icon's right in the window task bar.
User can add up to 6 alternate domains.