


Wireless network setup_ 28
The LED blinks slowly for up to two minutes until you enter the
eight-digit PIN number
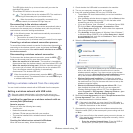
The wireless LED blinks in the order below:
a) : The light blinks fast on the wireless LED. The machine is
connecting to the access point (or wireless router).
b) : When the machine is successfully connected to the
wireless network, the wireless LED light stays on.
Re-connecting to the wireless network
When the machine is disconnected, the machine automatically tries to
re-connect to the access point (or wireless router) with the previously
used wireless connection settings and address.
In the following cases, the machine automatically re-connects to
the wireless network:
• Th
e machine is turned off and on again.
• Th
e access point (or wireless router) is turned off and on again.
Canceling a wireless network connection process
To cancel the wireless network connection function when the machine is
connecting to the wireless network, press and release the Power ( )
button on the control panel. You need to wait 2 minuites to re-connect
the wireless network.
Disconnecting a wireless network connection
To disconnect the wireless network connection, press the WPS ( )
button on the control panel for more than two seconds.
• When the machine is in idle mode: The machine is immediately
disconnected from the wireless network, and the wireless LED is off.
• Wh
en the machine is being used: While the machine waits until
the current job is finished, the light blinks fast on the wireless LED.
Then, the wireless network connection is automatically
disconnected. The wireless LED is off.
When the machine is disconnected, press the WPS ( ) button
on the control panel. The wireless function
is on and connecting to
a wireless network begins.
Setting a wireless network from the computer
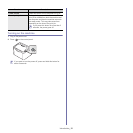
You can install a wireless network with a USB cable from the computer.
Setting a wireless network with USB cable
See your network administrator, or the person that set up your
wireless network, for information about your network configuration.
Installing the machine on a wireless network with an
access point (Windows)
Items to prepare
Ensure you have the following items ready.
• Access point
• Network-con
nected computer
• Softw
are CD that was provided with your machine
• Th
e machine installed with a wireless network interface
• USB c
able
Creating the infrastructure network in Windows
When the items are ready, follow the steps below:
1. Check whether the USB cable is connected to the machine.
2. Turn
on your computer, access point, and machine.
3. In
sert the supplied software CD into your CD-ROM drive.
• Th
e software CD should automatically run and an installation
window appear.
• If the installation window does not appear, click on Start and then
Run. Type X:\Setup.exe, replacing “X” with the letter which
represents your drive. Click on OK.
• If you use Wi
ndows Vista, Windows 7, or Windows Server 2008
R2 click on Start > All programs > Accessories > Run.
Type X:\Setup.exe replacing “X” with the letter that represents
your drive and click on OK.
• If
the AutoPlay window appears in Windows Vista, Windows 7,
or Windows Server 2008 R2, click on Run Setup.exe in Install
or run program field, and click on Continue or Yes in the User
Account Control window.
4. Select the W
ireless Setting and Installation option.
• Install Now: If you have already set up the wireless network,
click on this button to install the machine driver to use the
wireless network machine. If you have not set up the wireless
network, click on the Wireless Setting and Installation button to
set up the wireless network before you click on this button.
• W
ireless Setting and Installation: Configure the wireless
network settings of your machine with a USB cable then install
the machine driver. Only for the users who have not set up the
wireless connection before.
• Sh
ortcut to Wireless Setting program without CD: If you
have installed the printer driver once, you can access the
Wireless Setting program without CD. From the Start menu,
select Programs or All Programs > Samsung Printers > your
printer driver name > Wireless Setting Program
5. Read
the License Agreement, and select I accept the terms of the
License Agreement. Then, click on Next.
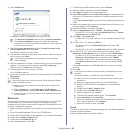
6. The software
searches the wireless network.
If the search has failed, you may check if the USB cable is
properly connected between the computer and machine, and
follow the instructions on the window.
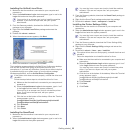
7. After
searching, the window shows the wireless network devices.
Select the name (SSID) of the access point you are using and click
on Next.
If you cannot find out the network name you want to choose, or
if you want to set the wireless configuration manually, click on
Advanced Setting.
• Enter the
wireless Network Name: Enter the SSID of
access point you want (SSID is case-sensitive).