


When the Drive Letter application has been installed (see above), drive letter icon(s) will only show up when a card is inserted. Also
the generic icon at each drive letter will be replaced by an icon representing the main card format(s) of each card slot.
Macintosh Disk Icons
When you connect the ImageMate Reader/Writer on a Macintosh operating system, removable disk icons labeled ‘no name’
representing the card slots show on desktop when a card is inserted.
When the Drive Letter application has been installed (see above), the generic disk icon will be replaced by an icon representing the
main card format(s) of the occupied slot(s).
Using
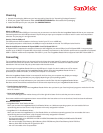
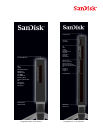
Inserting Card
To install a card into the ImageMate Reader/Writer’s card slot, insert the connector end of the card with the label facing to the
right (when placed on the stand).
Do not force the card into the slot.
LEDActivity
Each card slot has a blue LED:
• The LED turns on when a card is properly inserted
• The LED blinks when data is transferred from or to the card
If the LED is not on, check to make sure the ImageMate Reader/Writer is connected and the card is inserted properly.
NEVER remove the card when the LED is FLASHING.
Using it on a PC with the transfer button application
1. Go to www.sandisk.com/imagemate to download the ImageMate software and installation instructions for model
SDDR-189/SDDR-199.
2. Install the software according to the instructions.
3. After the software has been installed successfully and you have selected the application to launch every time you press the
button, press the button and access the files on the card through your favorite application.
Using it on a PC without the ImageMate software being installed
Here is the way to create a Folder on your Desktop and Copy and Paste your photos to it.
1. How to create a FOLDER on your Desktop
A. Place your mouse pointer somewhere on the Desktop but not on an icon.
B. Click once with the RIGHT mouse button, move your mouse pointer over NEW then click FOLDER with the LEFT mouse button.
C. This will create a NEWFOLDER on your Desktop. At this time you can name anything you like, i.e. My Pictures or Photos, by
typing the name in. When you are finished typing press the ENTER key on your keyboard. Now the folder name is saved.
2. How to copy and paste your photos into a folder
A. Double click on the icon “My Computer”.
B. Double click on the removable disk drive (for the ImageMate Reader/Writer), i.e. F: or G: or maybe E: Now you should see a
DCIM folder (that stands for Digital Camera Images).
C. Double click on the DCIM folder. Now you should see your camera folder, i.e. 100Olymp or 100Canon or 100Fuji.
D. Double click on the camera folder. Now you should see your pictures or picture file names (depending on what Operating
System you are using).
E. Go up to the menu bar where it says “EDIT” and click on “SELECTALL”. You will see all your pictures HIGHLIGHTED.
F. Go back to “EDIT” and now click “COPY”. Close or minimize this window.
G. Double click on the folder you created on your Desktop, go to “EDIT” then click “PASTE” and you should see the pictures
being copied to the folder.
H. To View your Pictures Double click on the File name and the Picture will open up.
Using it on Macintosh without the ImageMate software being installed
1. Connect the ImageMate Reader/Writer to the USB port on your Mac (do not connect to Monitor or Keyboard).
2. To transfer files place a card into the Reader/Writer unit. A new drive will appear on your desktop called “untitled”.
3. Drag and drop files to and from the new drive as you would to any other disk or folder.