


Unit 6: Maintenance
S8400 Series Operator Manual
6-7 PN: 9001160B
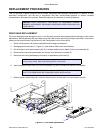
ADJUSTMENT PROCEDURES
This unit covers all of the printer and printer accessory adjustments. These adjustments include mechanical
adjustments required following the replacement of components and assemblies, in addition to, the operational
adjustments required following a job change.
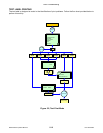
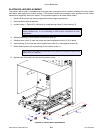
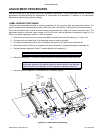
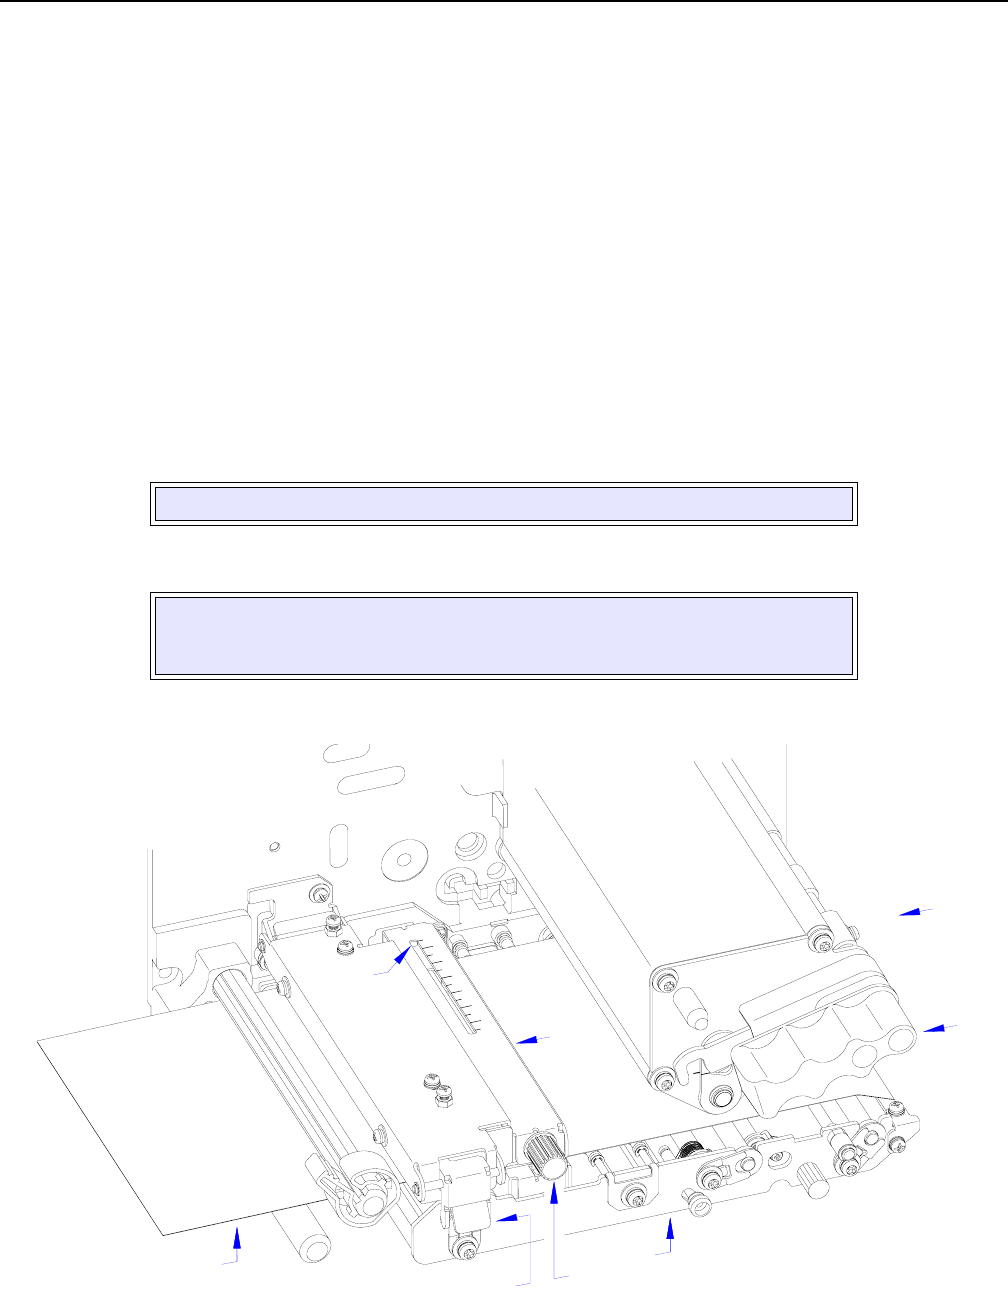
LABEL SENSOR POSITIONING
The label sensor assembly provides a mounting apparatus for the eye-mark, gap, and paper-end sensors. The
position adjustment for standard label media is 0mm (the inner most position). Zero (0mm) is the default setting.
When non-standard media is used, the label sensor must be adjusted to align with media’s reference mark. The
adjustment range for eye-mark sensor usage is 45.0 to 65.5mm, and the gap sensor adjustment range is 5.0 to
66mm. The sensor adjustment scale is in 5mm increments.
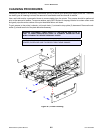
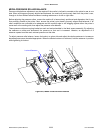
1 Open the front housing cover or remove the ribbon cassette to access print assembly (1, Figure 6-5).
2 Lift upward on print head latch (2) to disengage the print head as required.
3 Lift upward on label sensor latch (3) to hinge open the upper half of label sensor assembly (4).
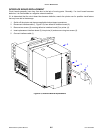
4 Place label media (5) face-up and laterally onto printer chassis (6). Relatch label sensor assembly (4).
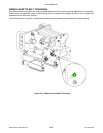
5 Find label sensor adjustment knob (7) located behind print assembly (1).
6 Manually rotate knob (7) to the left or right as required to properly position label sensor (8).
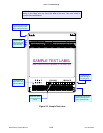
7 Test print a label to determine if label sensor (8) is properly aligned.
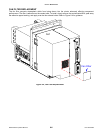
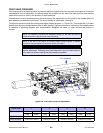
Figure 6-5, Label Sensor Positioning
NOTE: The label sensor adjustment knob is purple colored ABS plastic.
NOTE: Sensor positioning may also be achieved by measuring from the printer’s
center frame outward to the specified distance for sensor/reference mark alignment.
Refer to Figure 9-3 in the Appendix unit of this manual for applicable dimensions.
4
8
6
1
2
7
3
5