5
Installing the Software
Installing the Smart Label Program for MacOS X
1 Insert the Smart Label CD. If the installer does not appear automatically, double-click
the CD on your desktop or in the left pane of a new Finder window.
2 Double-click the file SIISmartLabelPrinter.mpkg. The installer will appear. Follow the
on-screen instructions.
3 For Mac OS X 10.2: After installation is complete, open Print Center and select your SLP
printer. Mac OS X 10.3 or 10.4 will automatically set up your printer.
Installing the Smart label Program for Windows
1 Insert the Smart Label CD. The installation wizard starts automatically on most systems.
If the introductory screen doesn’t appear after a few seconds, do the following:
2 Click the Windows Start button then point to Settings and choose Control Panel.
3 Double-click Add/Remove Programs then click the Install button. Follow the install
wizard to assist with installation.
Please note: If your printer is not recognized or all label templates do not appear,
you will need to set-up your printer within the SLP printer software. Please see
Setting up the Printer on page 7.
Connecting the SLP to a Power Outlet
Now you’re ready to connect the SLP to a power outlet:
1 Plug the AC adapter cable into the jack at the rear of the SLP and the other end
into a power outlet.
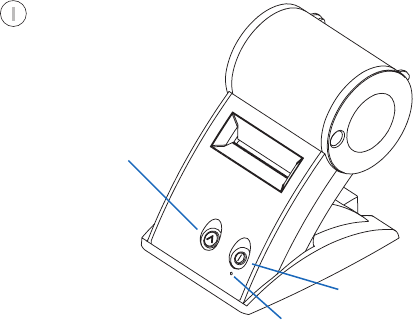
2 Turn the SLP on by pressing the power button.
When you turn the printer on, the status light flashes green.
This is just to let you know there are no labels in the printer.
Form Feed button
Status light
Power button


