


7
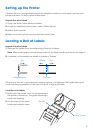
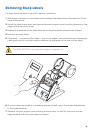
Spindle
Label Cover
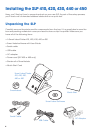
Setting up the Printer
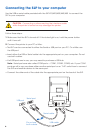
If the printer is not recogonized using the installation wizard, you will need to set up your
printer manually. To do so, follow these steps:
Prepare the roll of labels
1 Open the Smart Label printer software
2 Under the Label pull-down menu, select Printer Set-up
3 Select Add a printer
4 Select how your printer is connected and click Done.
Loading a Roll of Labels
Prepare the roll of labels
1 Remove the sticker from the beginning of the roll of labels.
Note: Make sure there is a black sensor mark on the label backing as shown on page 3.
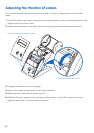
2 If needed, cut between the labels to create a “leader.”
If the end of the roll is not prepared as shown above, cut between the labels leaving as
much backing as possible on the end of the roll to act as a leader.
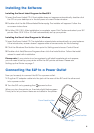
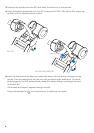
Load the roll of labels
1 Make sure the power cord is connected and
the printer is turned on. The green status light
should be flashing.
2 Lift the base of the label
cover and rotate it open.
Prepared end Cut here
Roll Waste Roll