


2-76
COPIER
Contents
1
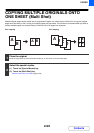
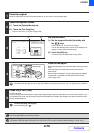
Place the original.
Place the original face up in the document feeder tray, or face down on the document glass.
2
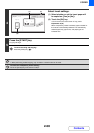
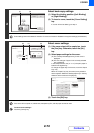
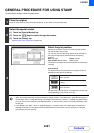
Select the special modes.
(1) Touch the [Special Modes] key.
(2) Touch the [Tab Copy] key.
Special modes menu (1st screen) (page 2-38)
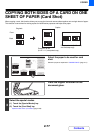
3
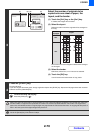
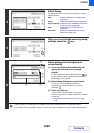
Set the tab width.
(1) Set the image shift width (tab width) with
the keys.
0 mm to 20 mm (0" to 5/8") can be entered.
You can also directly touch a numeric value display key to
change a number with the numeric keys.
(2) Touch the [OK] key.
You will return to the base screen of copy mode.
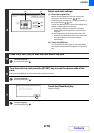
4
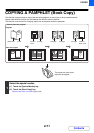
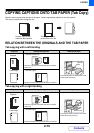
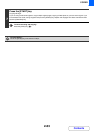
Load the tab paper.
When using the bypass tray, place the paper with the print side
down.
Place the paper so that the sides with the tabs enter the
machine last.
After loading the tab paper, configure the bypass tray settings
as explained in "MAKING COPIES USING THE BYPASS
TRAY" (page 2-35).
The width of the tab paper can be as wide as A4 width (210 mm) plus 20 mm (or 8-1/2" x 11" paper (8-1/2") plus 5/8").
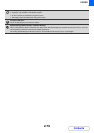
5
Press the [START] key.
Copying will begin.
If you are using the document glass to copy multiple original pages, copying will take place as you scan each original. If you
have selected sort mode, change originals and press the [START] key. Repeat until all pages have been scanned and then
touch the [Read-End] key.
To cancel scanning and copying...
Press the [STOP] key ( ).
To cancel tab copy...
Touch the [Cancel] key in the screen of step 3.
System Settings (Administrator): Initial Tab Copy Setting
The default image shift width can be set from 0 mm to 20 mm (0" to 5/8"). The factory default setting is "10 mm (1/2")".
Special Modes
OK
Cancel
OK
Tab Copy
10
(0~20)
mm
Image Shift
CopyOriginal
(2)(1)
Reverse side