Setup & Connections
14
COMPUTER COMPUTERAUDIO AUDIO
OUTPUT
(INPUT 1)
INPUT 1
RS-232C
Connecting the Projector
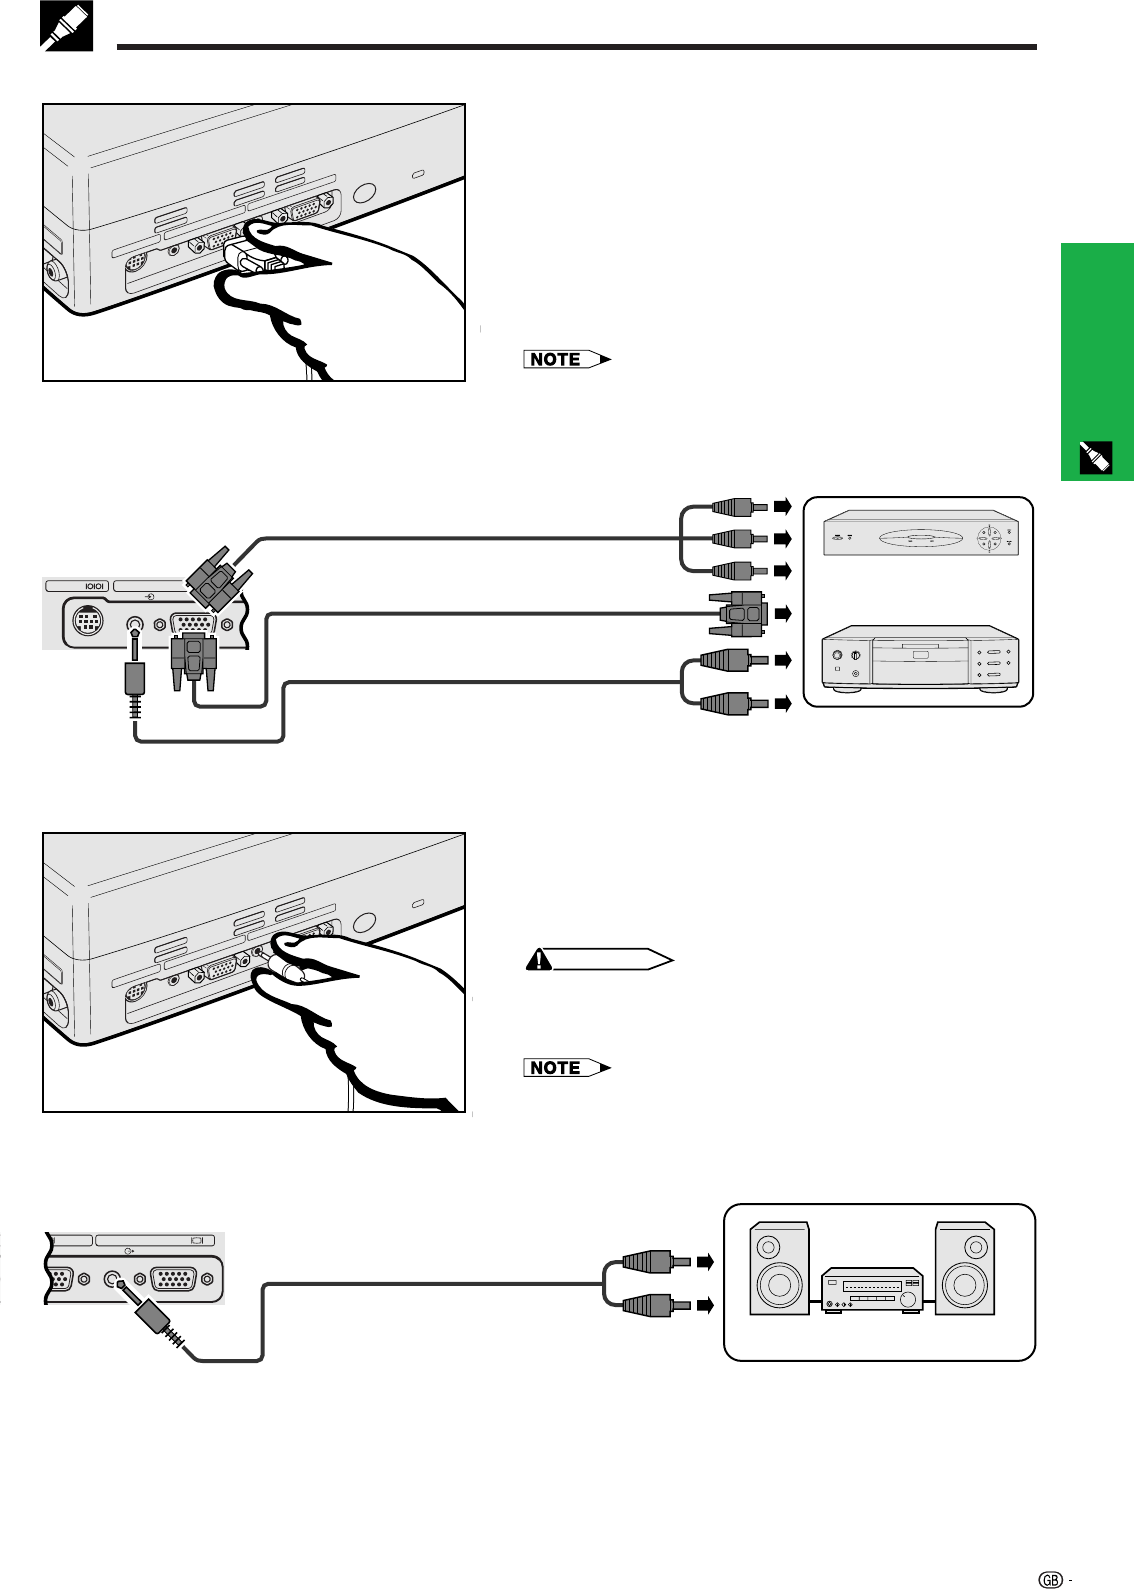
Connecting a video source (DTV decoder or DVD player) using the 15-pin input
1 Connect one end of the HD-15/RCA cable or the HD-
15-RGB cable to the COMPUTER INPUT 1 port on the
projector.
2 Connect the other end to the corresponding terminals
on the video source.
3 To use the built-in audio system, connect one end of
the audio cable to AUDIO INPUT 1 terminal on the
projector.
Connect the other end to the audio output terminals on
the video source.
• The projector can only accept 480P DTV signals through
COMPUTER INPUT 1 terminal. Therefore, set your DTV to RGB
monitor output.
• The image quality may become lower depending on DTV signal
compatibility.
2 To video output terminals
Projector
Connecting an amplifier and other audio components
1 Connect one end of the audio cable to the AUDIO
OUTPUT terminal for INPUT 1 on the projector.
2 Connect the other end to the corresponding terminals
on the audio components.
CAUTION
• Always turn off the projector while connecting to audio
components, in order to protect both the projector and the
components being connected.
• By using external audio components, the volume can be
amplified for better sound.
• The AUDIO OUTPUT terminal for INPUT 1 allows you to output
audio to audio components from the AUDIO INPUT 1 terminal
connected to audiovisual equipment.
COMPUTER COMPUTER
O
AUDIO
OUTPUT
(INPUT 1)
INPUT 1
Projector
Amplifier
To audio input terminals
Audio cable (sold separately)
HD-15-RGB cable (sold separately)
Audio cable (sold separately)
3 To audio output terminals
2 To video output terminals
HD-15/RCA cable (sold separately)
DTV decoder
or
DVD player


