4
E
Using the USB Flash Drive Media Tool
Caution
• Do not use a USB ash drive containing slideshow les for
any other purpose.
• Before using this software, back up the les on the USB
ash drive.
• For information on handling a USB ash drive, see the
manufacturers manual for the USB ash drive.
• Up to 600 les can be handled in the slideshow folder.
Preparing a new USB ash drive
Store the les you want to play in a slideshow in a USB ash
drive.
1. Connect the USB ash drive to your computer.
2. Start this software.
Double-click the “USB Flash Drive Media Tool” shortcut
icon (
) on your desktop.
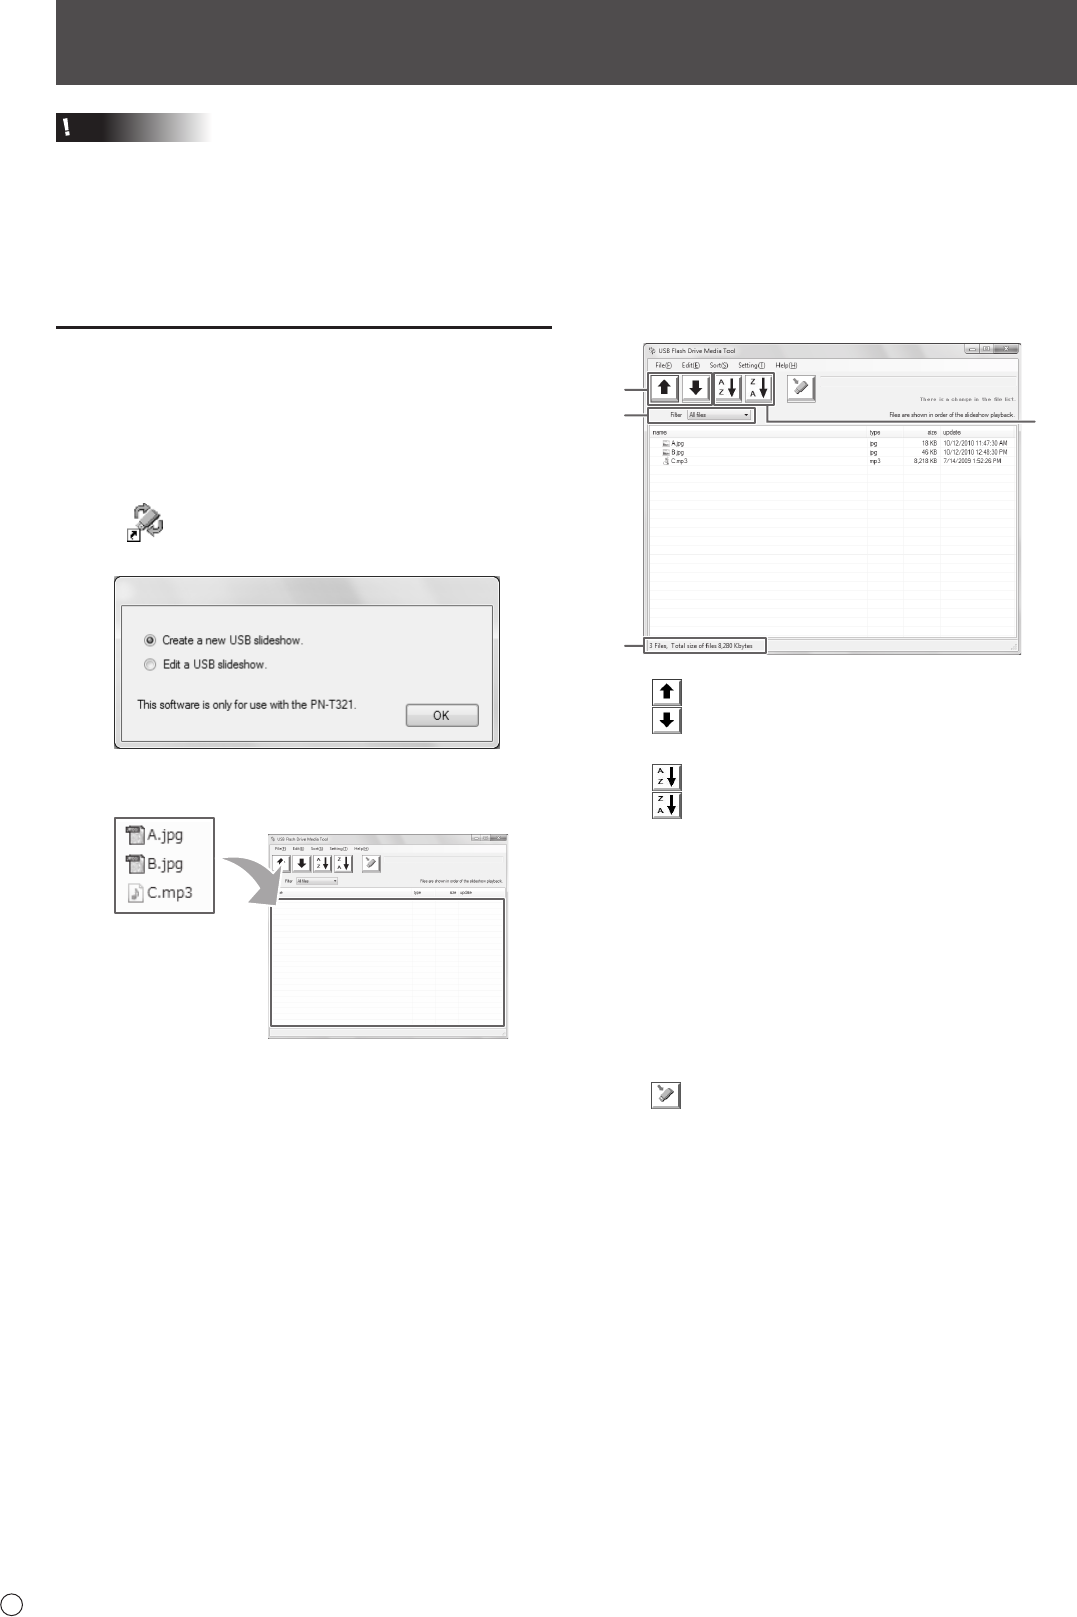
3. Select “Create a new USB slideshow.” and click “OK”.
4. Drag and drop the les that you want to add from the
Explorer window.
5. Sort the les into the order that you want them to play.
• The slideshow plays in order from the top.
• “Classify les into Image, Audio or others” can be
selected in the Sort menu to sort the displayed les by
type (image/audio/other).
• To delete a le, select the le and then select “Delete
selected le” from the Edit menu, or press the [Delete]
key on your keyboard.
• To display the contents of a le, select the le and then
select “Enable Preview” from the Setting menu.
(1) “Move selected le up”
“Move selected le down”
Moves the selected le up or down.
(2)
“Sort by le name (ascending)”
“Sort by le name (descending)”
Sorts the displayed les by name in ascending or
descending order.
(3) Shows les of the selected type normally and grays
out all other les.
All les .........All les
Image les ...jpg (jpeg), png
Audio les ....mp3, wma
Other les ....Other than the above image/audio les.
(4) Shows the number of les in the folder and the total
data size.
6. Click
“Write to USB Flash Drive”.
The les is written to the USB ash drive.
7. Select the drive and folder where you want to save
les, and click “Select”.
To refresh the information, click “Refresh”.
The les are saved to the USB ash drive. When nished,
a message appears. Click “OK”.
8. Select “Exit” from the File menu.
9. Remove the USB ash drive.


