


Useful Features
-53
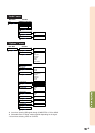
Computer Image Adjustment (“Fine Sync” menu)
11
11
1
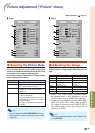
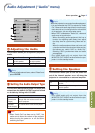
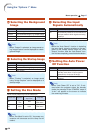
Adjusting the Computer
Image
Use the Fine Sync function in case of irregulari-
ties such as vertical stripes or flickering in por-
tions of the screen.
Note
• You can automatically adjust the computer im-
age by setting “Auto Sync” on the “Fine Sync”
menu to “Normal” or “High Speed”, or by press-
ing AUTO SYNC on the projector or on the re-
mote control. See page 54 for details.
• To reset all adjustment items, select “Reset” and
press ENTER.
Selectable items
Clock
Phase
H-Pos
V-Pos
Description
Adjusts vertical noise.
Adjusts horizontal noise (similar to
tracking on your VCR).
Centers the on-screen image by
moving it to the left or right.
Centers the on-screen image by
moving it up or down.
22
22
2
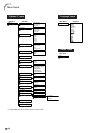
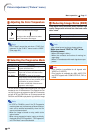
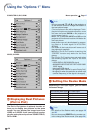
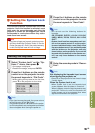
Saving Adjustment Settings
This projector allows you to store up to seven
adjustment settings for use with various com-
puters.
33
33
3
Accessing Adjustment
Settings
Adjustment settings stored in the projector can
be easily accessed.
Note
• If a memory has not been set, the resolution
and frequency setting will not be displayed.
• When selecting a stored adjustment setting with
“Select Setting”, you can set the projector in the
stored adjustments.
44
44
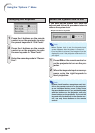
4
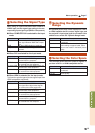
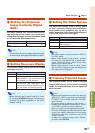
Setting the Resolution
Ordinarily, the type of input signal is detected
and the correct resolution mode is automatically
selected. However, for some signals, the optimal
resolution mode in “Resolution” on the “Fine
Sync” menu may need to be selected to match
the computer display mode.
Note
• If your computer displays patterns which repeat
every other line (horizontal stripes), flickering
may occur which makes the image hard to see.
• See “Checking the Input Signal” on page 54 for
information on the currently selected input sig-
nal.
1
1
2
3
4
5
6
7
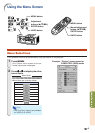
Menu operation Page 47