


Useful Features
-57
55
55
5
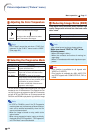
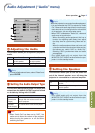
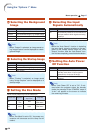
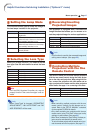
Setting the Video System
The video input system mode is factory preset
to “Auto”; however, a clear picture from the con-
nected audio-visual equipment may not be re-
ceived, depending on the video signal difference.
In that case, switch the video signal.
Note
• The video signal can only be set in VIDEO or
S-VIDEO mode.
• When “Video System” is set to “Auto”, you may
not receive a clear picture due to signal differ-
ences. Should this occur, switch to the video
system of the source signal.
• While “Video System” is set to “Auto”, when
PAL-M or PAL-N signal is input, the image from
PAL signal will be displayed.
66
66
6
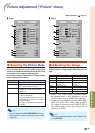
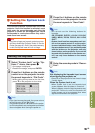
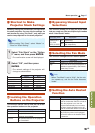
Capturing Projected Images
This projector allows you to capture projected
images (RGB signals) and set them as a startup
image, or background image when no signals are
being received.
Note
•
Images can be captured only when they are from
XGA (1024 × 768) non-interlace signals in COM-
PUTER1/2, DVI or HDMI mode with “RESIZE”
set to “Normal”.
• The saved image is reduced to 256 colors.
• Images from equipment connected to VIDEO
or S-VIDEO terminal cannot be captured.
• Only one image can be captured and saved.
• The color of images may differ before and after
saving if an image is captured on which image
adjustment has been performed using the
“C.M.S.” function.
• To delete the captured image, select “Delete”,
and then press ENTER.
Description
When connected to PAL video equipment.
When connected to SECAM video equipment.
When reproducing NTSC signals in PAL
video equipment.
When connected to NTSC video equipment.
Selectable items
PAL (50/60 Hz)
SECAM
NTSC4.43
NTSC3.58
33
33
3
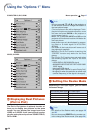
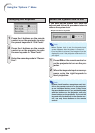
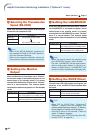
Shifting the Projected
Image Vertically (Digital
Shift)
For easier viewing, this function shifts the im-
age projected on the screen up or down elimi-
nating either the upper or lower black band found
in 16:9 and other wide aspect ratios.
Note
• This function will not work depending on the type
of resize mode. See pages 39 and 40 for details.
44
44
4
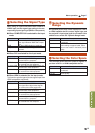
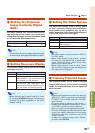
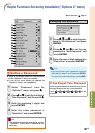
Setting On-screen Display
This function allows you to turn the on-screen
messages on or off.
Note
• When “Keylock Level” is set to “Level A” or “Level
B”, pressing STANDBY displays “All buttons on
Projector are locked.” regardless of the “OSD
Display” setting.
Press \
Shifts the projected image
down.
Press |
Shifts the projected image
up.
Menu operation Page 47
Description
All on-screen displays are displayed.
INPUT/VOLUME/MUTE/FREEZE/AUTO
SYNC/MAGNIFY/ “An invalid button has
been pressed.” are not displayed.
All on-screen displays are not displayed (ex-
cept the menu, H&V LENS SHIFT, KEY-
STONE, FOCUS, ZOOM, “All buttons on Pro-
jector are locked.” and warning displays).
Selectable items
Normal
Level A
Level B