


8 Projector Replacement Guide for the 2000i 99-00496-00 REV A0
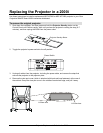
To change the image size
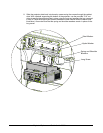
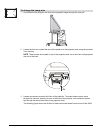
1. Crouch behind the projector and look at the projected image through the view port.
2. Loosen the four hex screws that secure the projector to the projector plate using the provided
3 mm hex key.
NOTE: These screws are located on top of the projector plate, two at the front of the projector
and two at the back.
4x
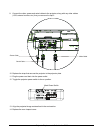
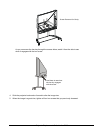
3. Loosen the two hex screws at the front of the projector. To access these screws, reach
through the view port, extend your arm to the front of the projector, and maneuver the hex
key through the two access holes in the projector cover.
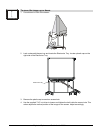
The following figure shows the location of these two access holes from the front of the 2000i.
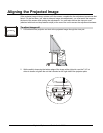
Image Size Adjustment