


VAIO Digital Studio™ Computer User Guide
30
3030
30
2
22
2 Click the System icon.
The System Properties window appears.
3
33
3 Click the Device Manager tab.
4
44
4 Click Sony i.LINK(1394) Adapter.
The Sony i.LINK(1394) Adapter window appears.
5
55
5 Click the Enable Device button.
6
66
6 Click OK.
The Sony i.LINK(1394) Adapter icon should no longer have an “X” on it.
This means Smart Connect is now enabled.
7
77
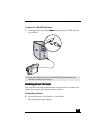
7 Close all windows and restart your computer in order for the new settings to
take effect.
Now your Smart Connect software is ready to use.
Enabling
Enabling Enabling
Enabling Ethernet
EthernetEthernet
Ethernet
Your computer comes with a preinstalled Ethernet interface. To enable faster
startup, your computer ships with this function disabled. You may, however,
enable Ethernet connectivity by following the instructions below.
To enable the Ethernet connection:
1
11
1 Right-click My Computer on the desktop and select Properties.
2
22
2 Click the Device Manager tab.
3
33
3 Select “Realtek RTL8139 (A/B/C/8130) PCI Fast Ethernet NIC” under the
Network Adapters category.
4
44
4 Click Properties.
5
55
5 Click Enable Device and then click OK.
6
66
6 Click Close.
✍
When you use Smart Connect to connect two VAIO computers, you must assign each
computer a unique name by which it can be identified when the two computers are
networked. See the Smart Connect online Help for more information.