


Removing, Installing, and Replacing Components
37
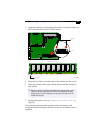
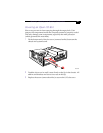
Replacing the Hard Drive
1 Remove the system cover (see “Removing the System Cover” on
page 22).
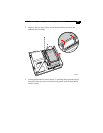
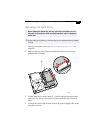
2 Remove the two screws that secure the hard drive carrier to the
diskette drive housing.
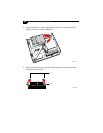
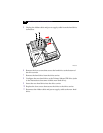
3 Lift the hard drive carrier about ½” (until it reaches the stops), then
pull sideways (away from the front panel) until the drive carrier is
clear.
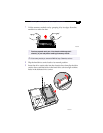
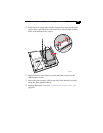
4 Untwist the white cable tie that secures the power supply cable to the
hard drive carrier.
! Before opening the system unit, save any open files, exit Windows, turn off
the power of the computer and all attached peripherals, and then unplug the
power cord.
✍
Be sure to back up any files on your hard drive that you want to preserve before you replace
the drive.
MAN002.VSD