


SpectraLink Corporation Installation, Configuration, and Administration
NetLink SVP Server (within IP environments)
PN: 72-0178-01-F.doc Page 16
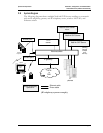
4. Configuring the NetLink SVP Server
During initial setup of the NetLink SVP Server the IP address is established and the
maximum number of active calls per AP is set. Optionally, you may enter a
hostname and a location for software updates via TFTP.
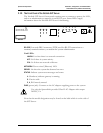
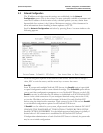
4.1 Connecting to the NetLink SVP Server
The initial connection to the NetLink SVP Server must be made via a serial
connection to establish the NetLink SVP Server’s IP address. After the IP address is
established, connection to the NetLink SVP Server may be done via the network
using telnet. It is recommended that the basic setup actions occur while the serial
connection is made.
Connect via the Serial Port
1. Using a DB-9 female, null-modem cable, connect the NetLink SVP Server to the
serial port of a terminal or PC.
2. Run a terminal emulation program (such as HyperTerminal™) or use a VT-100
terminal with the following configuration:
Bits per second: 9600
Data bits: 8
Parity: None
Stop bits: 1
Flow control: None
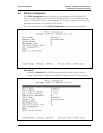
3. Press Enter to display the NetLink SVP Server login screen.
4. Enter the default login: admin and default password: admin. These are case
sensitive.
The NetLink SVP-II System menu will display.
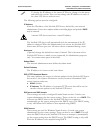
Connecting Via Telnet
Telnet can only be used after the NetLink SVP Server’s IP address is
configured.
The telnet method of connection is used for routine maintenance of the NetLink
Server for both local and remote administration, depending on your network.
To connect via telnet, run a telnet session to the IP address of the NetLink SVP
Server. Once you connect and log in, the
NetLink SVP-II System menu displays.