Fault Isolation
4-10 First Edition 96047
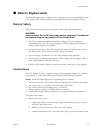
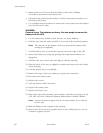
2. Remove the two (2) screws from the battery door with a Phillips
screwdriver and remove the battery door.
3. Disconnect the leads from the battery. Pull the connectors towards you to
disconnect the battery.
4. Use a Phillips head screwdriver to remove the screws that secure the battery
tray. Set the screws aside.
WARNING:
Personal injury. The batteries are heavy. Use two people to remove the
battery from the UPS.
5. Use the battery tray handle to slide the tray out about halfway.
6. Hold the tray from the sides and slide it out to the fully extended position.
Note: The stop tab on the bottom of the tray prevents the battery from
coming out completely.
7. Carefully lift the tray up so that the stop tab clears the edge of the UPS.
8. Return the battery tray using the package the replacement battery was
shipped in.
9. Hold the new tray on the sides and align it with the opening.
10. Raise the back of the tray up slightly to position the stop tab on the inside
of the opening.
11. Push the battery tray in completely.
12. Remove the tape on the new battery to expose the connectors.
13. Reconnect the battery leads.
14. Replace the screws.
15. Tuck the battery cables into place.
16. Replace the battery door.
17. Replace the front cover.
18. Write down the model number, serial number, and date of purchase of the
UPS. APC will issue a Returned Material Authorization Number (RMA#).
Note: Contact Customer Support Services for this number if you did not
receive one.
19. Mark the RMA# on the outside of the package.
20. Return the UPS by insured, prepaid carrier to the address given to you by
Customer Support Services.


