


Chapter 6 Section 6.6
Implementing the JDBC/ODBC eWay Sample Projects Building and Deploying the prjJDBC_BPEL Sample Project
JDBC/ODBC eWay Adapter User’s Guide 113 Sun Microsystems, Inc.
Configuring the Integration Server
You must set your SeeBeyond Integration Server Password property before deploying
your Project.
1 From the Environment Explorer, right-click IntegrationSvr1 under your Logical
Host, and select Properties from the shortcut menu. The Integration Server
Properties Editor appears.
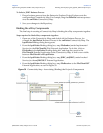
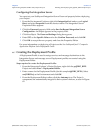
2 Click the Password property field under Sun SeeBeyond Integration Server
Configuration. An ellipsis appears in the property field.
3 Click the ellipsis. The Password Settings dialog box appears.
4 Enter STC as the Specific Value and as the Confirm Password, and click OK.
5 Click OK to accept the new property and close the Properties Editor.
For more information on deploying a Project see the Sun SeeBeyond Java™ Composite
Application Platform Suite Deployment Guide.
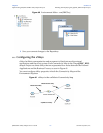
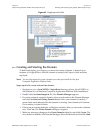
6.6.7 Creating the Deployment Profile
A Deployment Profile is used to assign services and message destinations to the
Integration Server and message server. Deployment profiles are created using the
Deployment Editor.
Steps required to create the Deployment Profile:
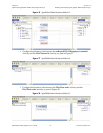
1 From the Enterprise Explorer’s Project Explorer, right-click the prjJDBC_BPEL
Project and select New > Deployment Profile.
2 Enter a name for the Deployment Profile (for this sample dpJDBC_BPEL). Select
envJDBCProj as the Environment and click OK.
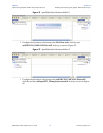
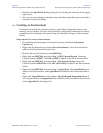
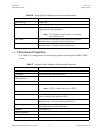
3 From the Deployment Editor toolbar, click the Automap icon. The Project’s
components are automatically mapped to their system windows, as seen in Figure
62.