


Chapter 6 Section 6.5
Implementing the JDBC/ODBC eWay Sample Projects Building and Deploying the prjJDBC_JCD Sample Project
JDBC/ODBC eWay Adapter User’s Guide 77 Sun Microsystems, Inc.
Steps required to create a new Connectivity Map:
1 From the Project Explorer tree, right-click the new prjJDBC_JCD Project and select
New > Connectivity Map from the shortcut menu.
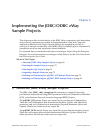
2 The New Connectivity Map appears and a node for the Connectivity Map is added
under the Project, on the Project Explorer tree labeled CMap1.
Create four additional Connectivity Maps—CMap2, CMap3. CMap4, and
CMap5— and rename them as follows:
cmDelete
cmInsert
cmPsSelect
cmTableSelect
cmPsUpdate
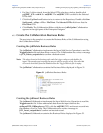
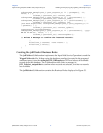
The icons in the toolbar represent the available components used to populate the
Connectivity Map canvas.
Populating the Connectivity Map
Add the Project components to the Connectivity Map by dragging the icons from the
toolbar to the canvas.
Each Connectivity Map in the prjJDBC_JCD sample Project requires the following
components:
File External Application (2)
JDBC External Application
Service
Any eWay added to the Connectivity Map is associated with an External System. To
establish a connection to JDBC, first select JDBC as an External System to use in your
Connectivity Map.
Steps required to select a JDBC External System:
1 Click the External Application icon on the Connectivity Map toolbar.
2 Select the external systems necessary to create your Project (for this sample, JDBC
and File). Icons representing the selected external systems are added to the
Connectivity Map toolbar.
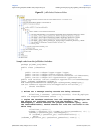
3 Rename the following components and then save changes to the Repository:
File1 to FileClientIN
File2 to FileClientOUT
JDBC1 to esJDBCOUT
4 Rename each Connectivity Map Service to match the intended operation, as for
example:
jcdDelete