


5-27
Chapter 5: Chassis Setup and Maintenance
5-13 Removing and Installing System Fans
Removing and Installing Internal System Fans
Removing Internal System Fans
1. Power down the system and remove the power cords from the rear of the
power supplies as described in Section 5-2. Remove the node from the
chassis as described in Section 5-4 and remove the cover from the node as
described in Section 5-5.
2. Disconnect the wiring to all three fans.
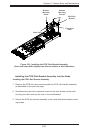
3. Remove the four screws securing the fan tray to the oor of the node and set
them aside for future use.
4. Lift the fan tray up and out of the node.
5. Push upward on the underside of the failed fan to remove it from the fan tray.
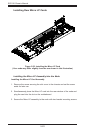
Installing Internal System Fans
1. Insert the replacement fan into the fan tray, making certain that the fan is fac-
ing in the same direction as the other fans in the fan tray.
2. Place the fan tray in the node.
3. Secure the fan tray to the oor of the node with the four screws previously set
aside.
4. Reconnect the wiring to the fans.
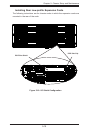
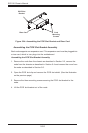
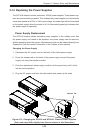
Figure 5-28:
Removing the Fan Tray
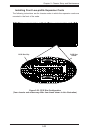
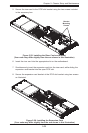
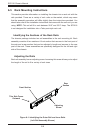
Figure 5-29:
Removing the Fan from the Fan Tray
(Your node may differ slightly from the one shown in this illustration)