


2-2
SUPER PIIIDM6/PIIIDM4/PIIIDM3/PIIIDME User's Manual
Installation
Heat Sink
Follow the instructions that came with your processor or heat sink to
attach a heat sink to the processor. Your heat sink should have a 3-pin
fan, which connects to the CPU 1/2 header. Make sure that good contact
is made between the CPU cartridge and the heat sink, particularly with
SECC2 Pentium III OEM packages. Insufficient contact will cause the
processor to overheat, which may crash the system.
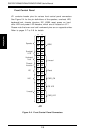
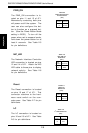
URM
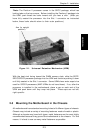
Your motherboard has a preinstalled URM (Universal Retention Mecha-
nism). A picture of a URM is shown in Figure 2-1. (This is one of
several types - all of which can support SEPP, SECC and SECC2 pack-
ages.) Before installing your processor, you must flip the arms of the
URM to their upright positions. Some URMs may have extra caps to be
used for Pentium III processors (AMP URMs do not use these). After the
processor is installed in the motherboard, place one of these caps (if
included) on each end of the URM and push down until they snap into
place. These caps are not left/right specific.
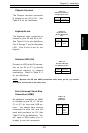
Processor
You are now ready to install the processor. Your motherboard has a Slot
1 type connector, which supports Celeron, Pentium II* and Pentium III pro-
cessors housed in SEPP, SECC* and SECC2 packages, respectively. Please
see the note on the following page when installing a Pentium II processor
with the SECC package.
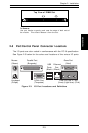
2-2 Processor Installation
When handling the processor package, avoid placing
direct pressure on the label area of the fan.
The following pages cover the installation procedure. You should install the
processor to the motherboard first, then install the motherboard in the chassis,
then the memory and add-on cards, and finally the cables and drivers. Following
the installation procedures in the order they appear in this chapter should elimi-
nate the most common problems encountered when installing a system.
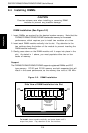
IMPORTANT: Always connect the power cord last and always remove it
before adding, removing or changing any hardware components.
!