


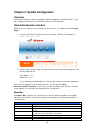
Storage Management
The Storage Menu displays the status of storage devices installed or connected
to the N199, including disk and RAID information.
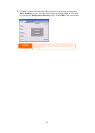
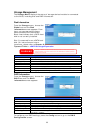
Disk Information
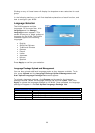
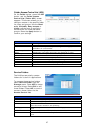
From the Storage menu, choose the
Disks item and the Disk
Information screen appears. From
here, you can see various items
about installed SATA hard disks.
Blank lines indicate that a SATA hard
disk is not currently installed.
Slot 2 is reserved for an eSATA hard
disk. For instructions on how to
install one, please refer to Chapter 6
Tips and Tricks >
:
eSATA Strorage Expansion.
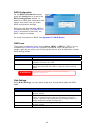
WARNING
Installing an eSATA hard disk will erase all data on that disk. This data can not be
recovered. Please ensure that all contents on the eSATA disk are backed up before
installing into the N199.
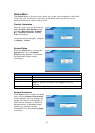
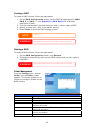
Disk Information
Item Description
Disk Slot Indicates disk location.
Capacity (MB) Shows the SATA hard disk capacity.
Model Displays the SATA hard disk model name.
Firmware Shows the SATA hard disk firmware version.
Status Indicates the status of the disk. Can read OK, Warning, or Failed.
Total Shows the total SATA hard disk capacity.
File System Check Click Apply to run a file system check on installed hard disks.
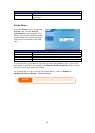
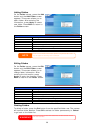
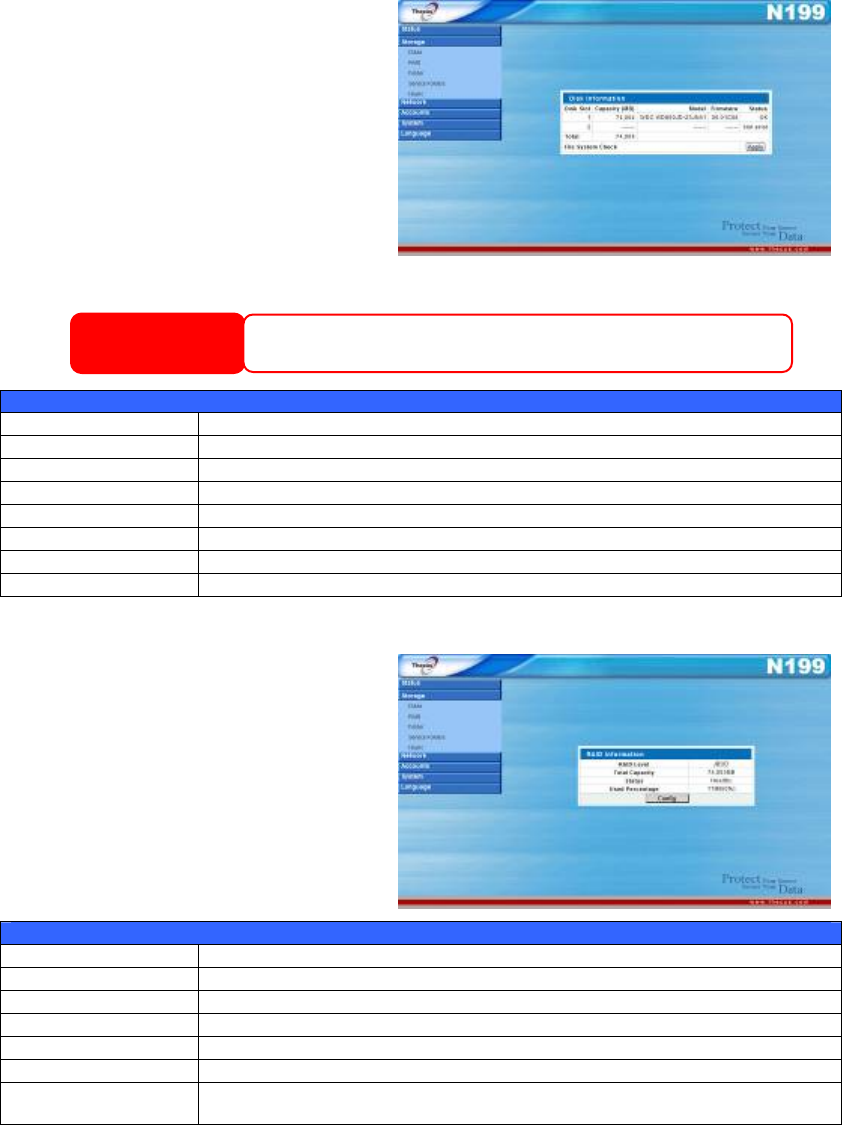
RAID Information
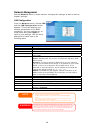
From the Storage menu, choose the
RAID item and the RAID
Information screen appears.
RAID Information
Item Description
RAID Level Shows the current RAID configuration.
Total Capacity Shows total capacity of the RAID configuration.
Status Indicates status of the RAID. Can read either Healthy or Failed.
Used Percentage Displays percentage of used RAID capacity.
Stripe Size* Shows the current disk stripe size. *(Only with RAID 1 enabled)
Remaining Time* Indicates time remaining until the RAID is finished building. *(Only
with RAID 1 enabled)
To configure your RAID settings, press the Config button to go to the RAID
Configuration screen.
23