41
Operations
40
Please read this chapter if the model you purchased includes a PC card slot.
Models equipped with PC card slot are able to read JPEG files stored on a memory PC
card, and display them on the screen.
This allows you to give presentations without a computer, create advertising screen board
using the auto slide show function, and more. (It is not possible to reproduce animation
effects, such as those produced by Microsoft
®
PowerPoint
®
.)
■ Memory PC cards
● PC card slot types
The PC card slot installed on this projector is TYPE II (PCMCIA Release 2.1)-compliant.
Please use memory PC cards and conversion adapters compliant with this type of PC
card slot.
● Supported storage media types
This projector supports the following types of ATA-compliant storage media. This
owner’s manual refers to the combination of the ATA conversion adapter and media in
use as a “memory PC card.”
Storage media that can be used as-is
Flash ATA card, TOSHIBA Mobile Disk
Storage media that can be used in combination with each of the ATA conversion
adapter types
SmartMedia™, compact Flash cards, SD memory cards
Note that inserting conversion adapters and memory cards with different functions
than above, and other memory cards (excluding the supplied wireless LAN PC card)
into the projector could damage the PC card or cause malfunctions.
● Memory PC Cards Whose Operation Have Been Confirmed
Please note that presence on this list is not a guarantee of operation.
• TOSHIBA Mobile Disk: PAMHD005(5GB), MEHDD20A(2GB)
• Flash ATA cards: I-O DATA PCFCA-96M (96MB), PCFCA-128M (128MB)
• SmartMedia™: TOSHIBA PDR-SM16 (16MB), PDR-SM32 (32MB),
PDR-SM64 (64MB)
Adapters: FUJIFILM PC-AD3B, OLYMPUS MA-2
• Compact Flash cards: SanDisk SDCFB-64-505 (64MB), SDCFB-128-505 (128MB)
Adapters: SanDisk SDCF-31
• SD memory cards: Panasonic RP-SD032 (32MB)
Adapters: Panasonic BN-SDAAP3
The TOSHIBA IPC5019A SmartMedia™ PC card adapter is not ATA-compliant, and so
cannot be used by this projector.
● Backing up data
Toshiba recommend that you back up the data on the memory PC card before use.
(Toshiba assume no liability for losses incurred by data lost through the use of this
projector.)
Projecting images stored in a memory PC card
3
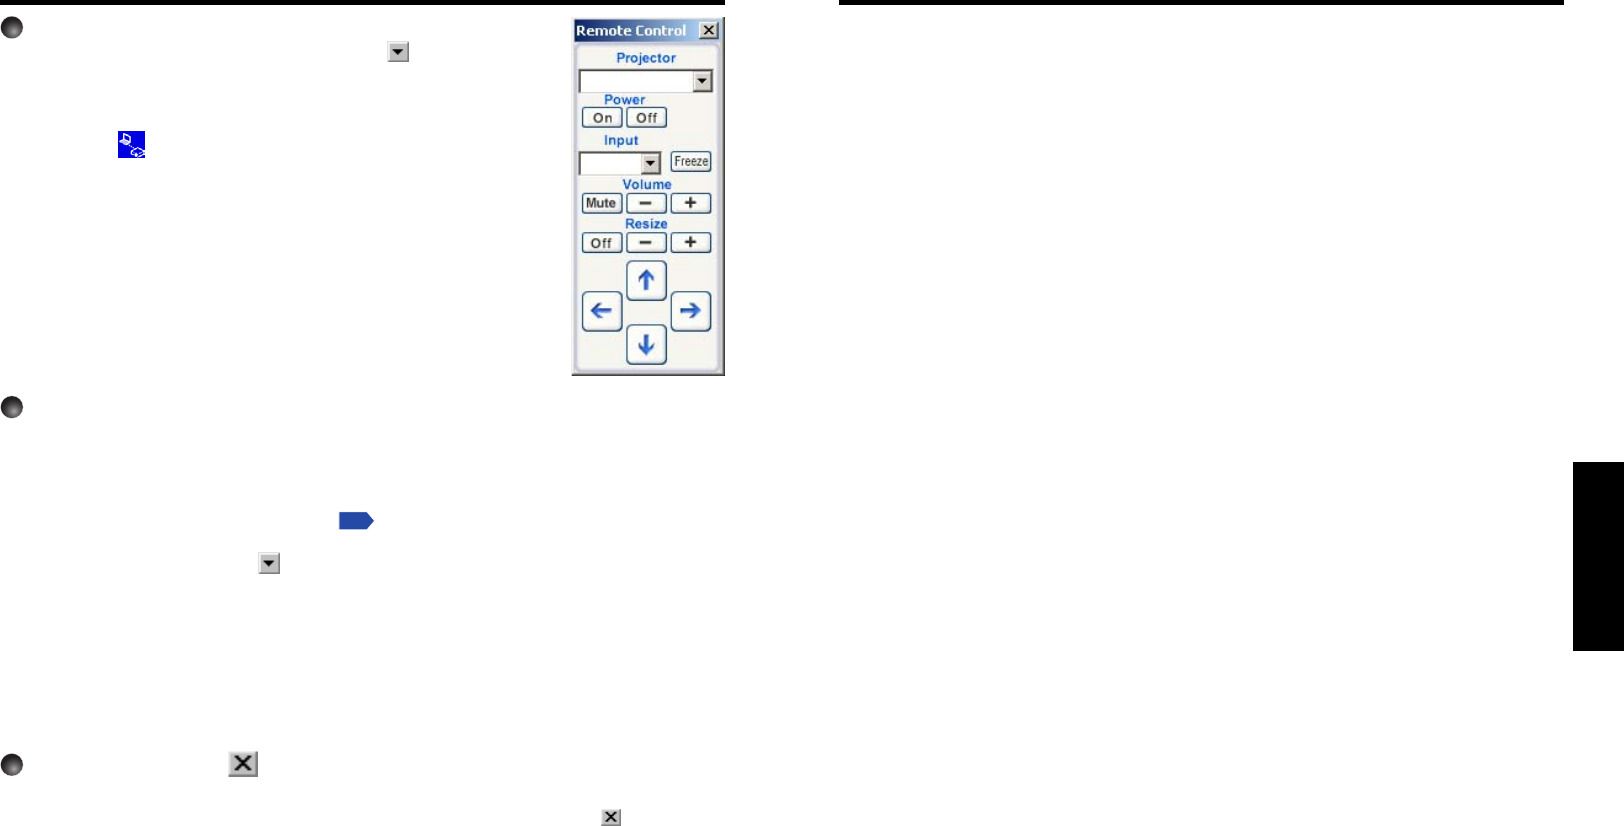
Select the projector to be operated.
In the Remote Control window, click on the button, and
select the desired projector from the pull-down list.
Only one projector can be selected. (It is not possible to operate
multiple projectors.)
Then icon
is displayed on the projector’s screen for few
seconds.
4
Click on the Remote Control window’s buttons.
The function of each button and box is as follows:
Power On: Turns projector power on.
Power Off: Turns projector power off.
Note, however, that if Standby mode is set to Economy from the
Default setting menu
p.54
, it is not possible to switch from off to on.
(Standby power consumption during Economy is about 6W.)
Input (box) : Click on the
button, and select the desired input from the pull-down
list.
Mute: Cuts off picture and sound. Click again to restore picture and sound.
Freeze: The picture is paused. Click again to release the freeze function.
Volume (+/–) : Adjusting sound volume.
Resize (+/–) : Displays expanded image.
↑↑
↑↑
↑/
↓↓
↓↓
↓/
←←
←←
←/
→→
→→
→: Moves expanded image.
Resize Off: Restores picture to its original size.
5
To quit, click on the button on the Remote Control window.
Performing this does not close the Wireless Utility window.
To exit both the Wireless Utility and the Remote Control, click on the
button on
the Wireless Utility window.
Using the wireless LAN PC card (Continued)


