8. RIBBON LOADING INSTRUCTIONS
EM1-33046A
8. RIBBON LOADING INSTRUCTIONS
4
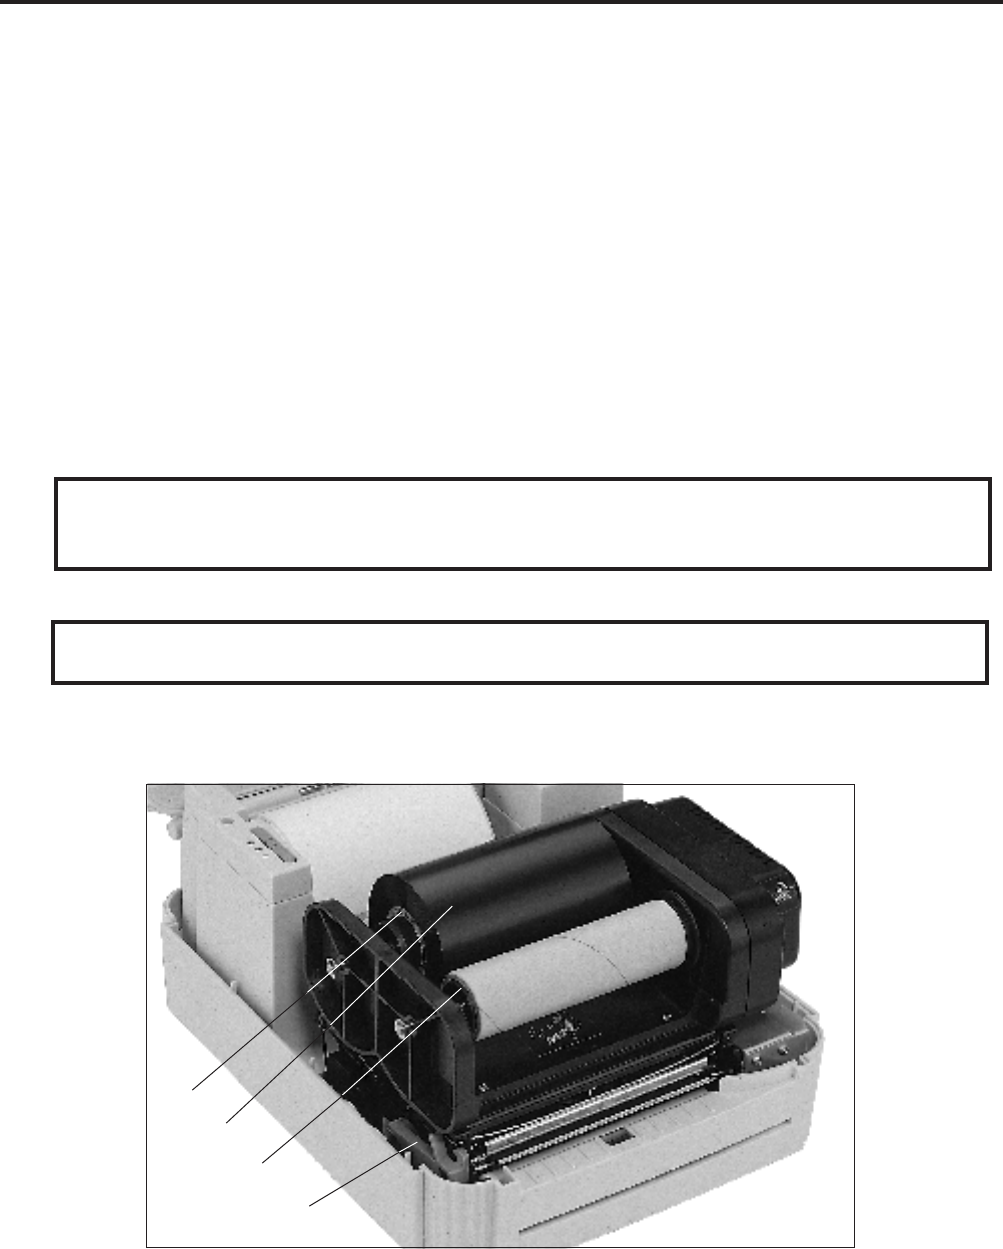
Fig. 8-1 Placement of Ribbon Supply Roll
1. Printer Carriage Release Lever 3. Ribbon Rewind Roll
2. Ribbon Supply Roll 4. Thermal Transfer Ribbon
8. RIBBON LOADING INSTRUCTIONS
1. Place an empty roll on the front ribbon rewind spindle.
2. Loosen the tape that secures the ribbon leader and fold it over the end of the leader. The tape will
be used to affix the leader to the ribbon rewind roll.
3. Install the ribbon supply roll on the rear spindle so that the ribbon feeds from the top of the roll toward
the rear. Position the ribbon roll at the center of the spindle. Guide the end of the leader through
the ribbon feed slot.
4. Open the printer carriage by pulling up the release lever on the forward left side of the front rubber
roller. Pull the leader forward and over the ribbon guide roller.
5. Using the tape at the end of the ribbon leader, affix the leader to the top of the rewind roll. Be careful
to align the sides of the leader to the sides of the roll.
6. Wind the ribbon rewind roll until the ribbon leader has wound onto the roll and the black part of the
ribbon is visible. Remove any excess slack.
CAUTION: Center both ribbon supply and rewind rolls on the spindles and parallel these
ribbon rolls with each other. Failure to do this may cause ribbon wrinkle or void
printing.
8. Close the top cover and press the Feed switch until the green On-line indicator light is illuminated.
NOTE: Make sure that both sides of the top cover are completely hooked.
7. Return the printer carriage to the down position
CAUTION: Both sides of the printer carriage must be hooked completely, otherwise blurred
print, media skew or ribbon wrinkle may be caused.
2
3
1
8-1


