- 79 -
Include Job Information: When this checkbox is checked, the job information obtained from the printer
through the SNMP feature is added to those to be printed. This information is displayed on the Network Tool.
Note: This feature is disabled as default. If you do not need the job information on the SNMP, do not change the default
setting.
Check Command Sequence: When this checkbox is checked, a command, which checks whether any
necessary command is missing from a command string the printer received, is attached. This function is
available only to the B-EV4-T and B-EV4-G.
• Command Protocol
Control Codes: Enables setting the control code for the printer commands. It must be the same as the
control code specified on the printer.
Note: By default, the “Standard” is specified. When Kanji code is specified for the printer font, PEF417, MicroPDF417,
Data Matrix, Maxicode, or QR code, set the “Control Codes” to “ESC/LF/NUL”. Failure to do so causes an error.
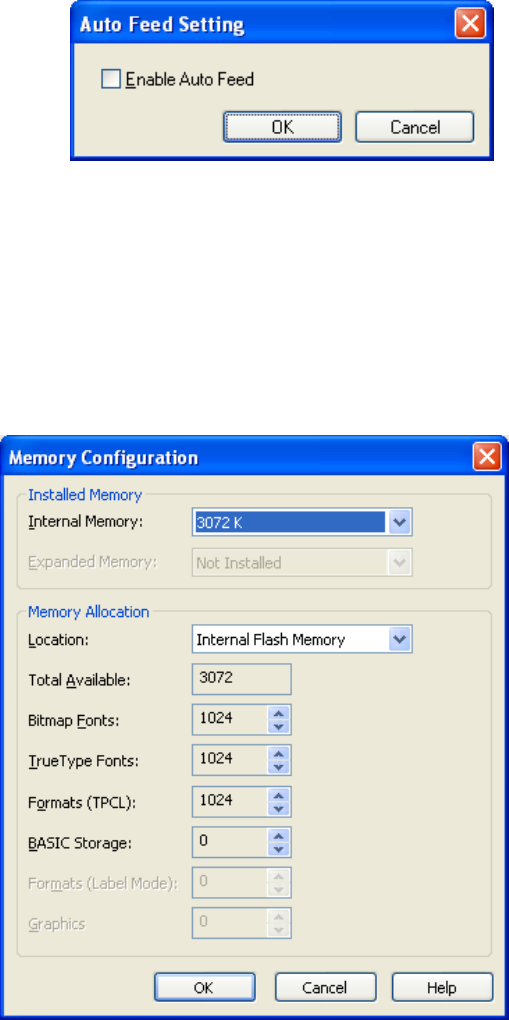
Auto Feed Setting (B-419 only): Allows selecting
whether to enable or disable the auto feed feature. When
the [OK] button is clicked, the setting is sent to the printer,
and this is possible while the printer and the PC are
communicable with each other and the printer is not
printing.
Supplement: If the printer does not perform the auto feed feature even if it is enabled, the printer will have a sensor
error. The setting can be changed during an error state.
For the B-419 with the auto feed feature enabled, the printer automatically feeds the media to the print start
position on the following conditions:
▪ When the media is manually inserted while the standby switch is turned on.
▪ The media is already loaded at the time the standby switch is turned on.
▪ When the top cover is closed after the media is loaded.
Note: To use the auto feed feature, the media must have black marks at the specified position on the reverse side.
• Configure Memory
If the allocated memory sizes are differ When the
“Configure Memory” is clicked, the screen on the
right is displayed to enable partitioning the
internal memory or the expansion memory into
areas of the specified size. When the [OK]
button is clicked, the changed memory allocation
will be set to the printer.
If the specified memory size is different from
those of the printer, the printer automatically
re-allocates in order of priority.


