Paper Jams 81
Paper Jams
Checking position of paper jams
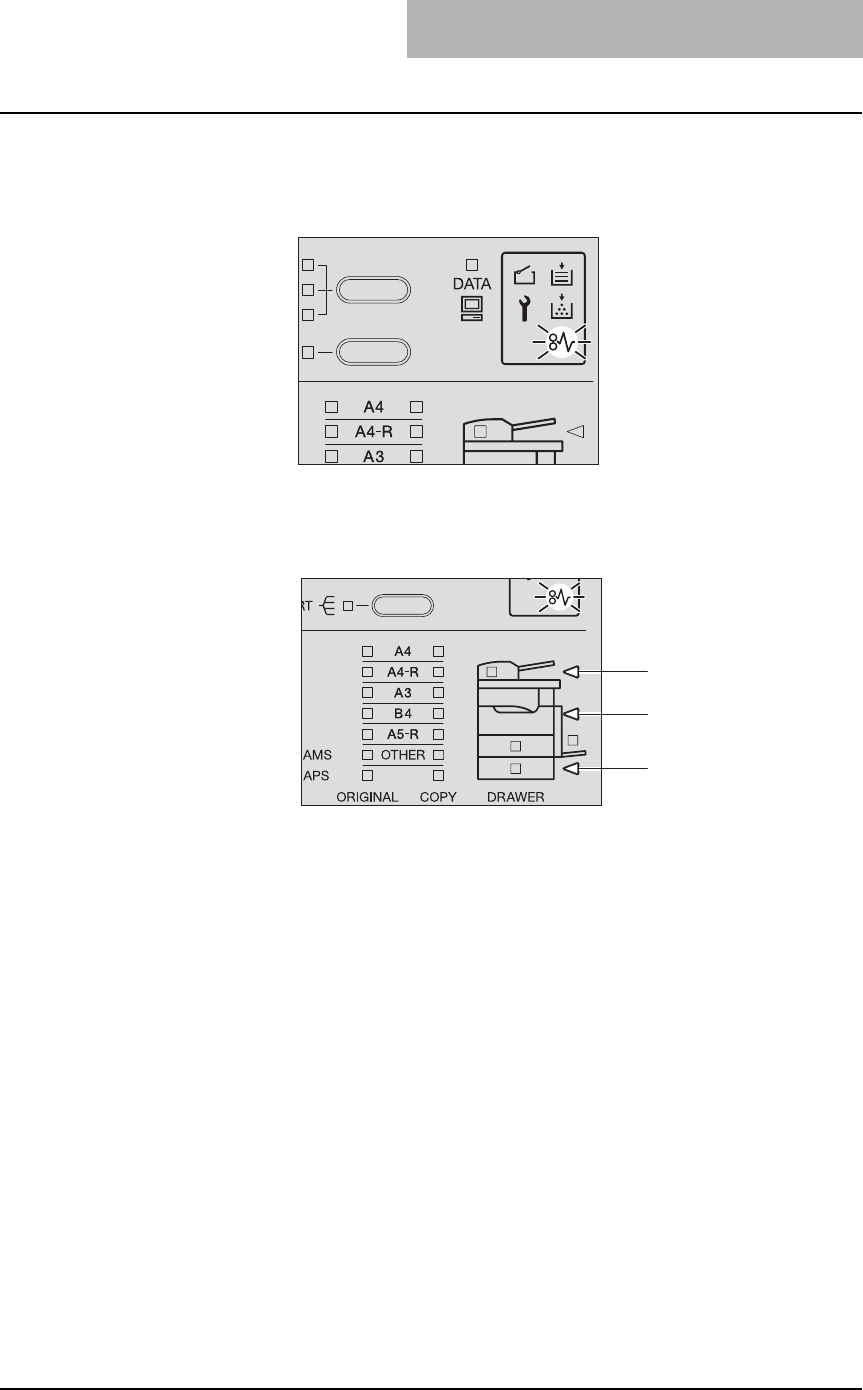
When an original or a sheet of copy paper has jammed within the equipment, copying stops and
the paper jam lamp blinks.
Additionally, the paper jam position lamp blinks to show you where the paper jam has occurred.
Check the position and release the jammed paper.
1. Automatic Document Feeder (optional) ( P.82)
2. Bypass tray ( P.84) / Transfer unit ( P.85) / Fuser unit ( P.86)
3. Paper Feed Unit (optional) ( P.88)
Release the jammed paper, and then press the [START] button. Copying resumes.
When paper jams occur frequently
When paper jams occur frequently, they may be due to one of the causes listed below. Check
the following items when they occur frequently:
y Originals which are not acceptable for the Automatic Document Feeder (optional) are
placed.
P.45 “Precautions for Automatic Document Feeder (optional)”
y Paper which is not acceptable for the equipment is used.
P.32 “Paper types not acceptable”
y The sizes of paper placed in the drawer or on the bypass tray are not registered into the
equipment properly.
P.37 “Preparation 3 - Registering Size of Paper Placed”
P.51 “Preparation - Registering paper size placed on bypass tray”
y More jammed paper is still remaining after the release of a paper jam.
y There is no gap between the side guides and the paper in the drawer, or the gap is too wide.
y The stack height of the paper is exceeding the indicators in the drawer.
1
2
3


