


Maintenance
Replacing the Power Module
WARNING: Do not connect the Power Module to the external power source before
installing it into the chassis. Failure to observe this caution could result in equipment
damage and/or personal injury or death.
To replace the Power Module, do the following:
1. Turn the power ON/OFF switch to the OFF position.
2. Disconnect the AC power cord from the power source.
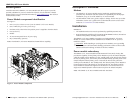
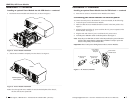
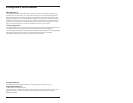
3. In necessary, remove the chassis grounding assembly. See Figure 8.
IONPS-A, AC Power Module
10
Tech Support: 1-800-260-1312 – International: 00-1-952-941-7600 – (24 hours)
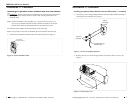
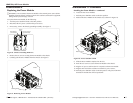
Figure 9: Removing Power Module
Figure 8: Chassis Grounding Hardware
Grounding Terminal
Lug (Not Provided)
Nuts & Washers
(Not Provided)
Chassis
Frame
Mounting Screws
Power Module
Chassis
4. Remove the two screws securing the Power Module to the chassis.
5. Carefully pull the Power Module from the chassis. See Figure 9.
techsupport@transition.com – Click the “Transition Now” link for a live Web chat.
11
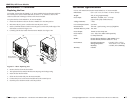
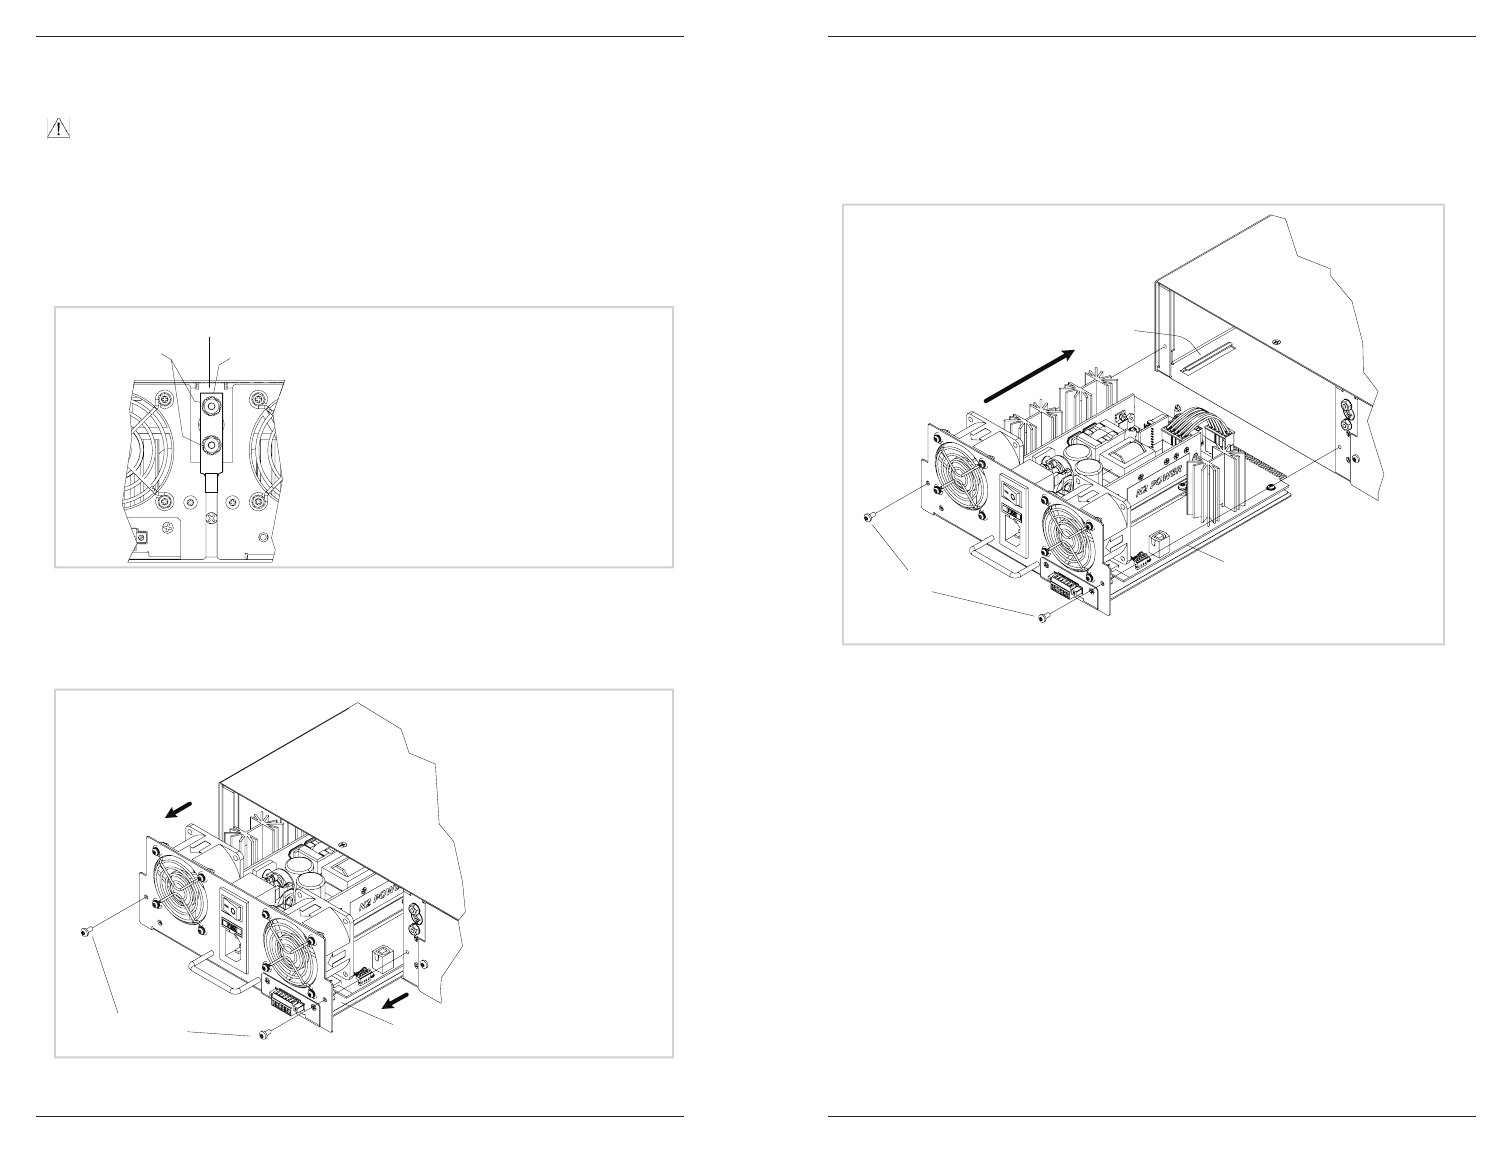
Figure 10: Power ON/OFF Switch
Maintenance — Continued
Installing the Power Module — continued
6. Locate the new Power Module.
7. Push the power ON/OFF switch to the OFF position.
8. Position the Power Module at the chassis slot, as shown in Figure 10.
9. Slide the Power Module complete into the slot.
11. Insert the two screws to secure the Power Module to the chassis.
12. Plug the AC power cord into the AC receptacle on the Power Module.
13. Plug the other end of the cord into an external AC power source.
14. Push the power ON/OFF switch to the ON position. The power ON LED
should be lit and the fans will be operational.
Mounting Screws
Power
Module
Chassis
Guide