


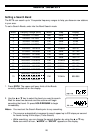

30
Programming Trunking Frequencies
There are three steps for programming a trunked system:
1. Program the Trunk Type – What type of system will the scanner be tracking, Motorola
Type II, Type I, EDACS, LTR, etc.
2. Program the Trunked Frequencies – Within a trunked system, the frequencies are
shared among all the users, called “Talk Groups”.
3. Program the Talk Groups – Within the trunked system, each agency or department is
assigned a Talk Group ID. This ID must be programmed into the scanner in order for it to
monitor that specific agency or department.
Before you start programming your scanner to track a trunked system, consider the
following:
• You can only program one trunking system in each bank of your scanner.
• Trunked frequencies must be entered while in the Trunk Programming mode.
• If you’re in the Trunk Programming mode, you cannot select channels in other banks.
For example, if you are programming Bank 4, you can only select channels 151-200 with
the
▲ or ▼ key.
•
IMPORTANT: If you are programming an EDACS
®
trunked system, you must enter the
frequencies in a specific order. Check the frequency guide included with the radio and the
listed web sites for details.
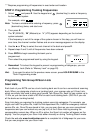
STEP 1: Selecting Trunking System Type
The first step in a Trunk Tracking system is storing the frequencies in one of the five
available banks in your scanner.
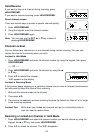
1. Press
TRUNK for 1.5 seconds.
You will hear two beeps, and “
BANK” and “TRUNK” will begin to flash on the display.
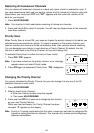
2. Select the bank you want to store the frequency by using the
keypad.
3. Select the system you want to track by using the
▲ or ▼ key,
then press
E.
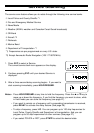
List of trunking systems as follows:
E2-800 (Motorola Type II 800 MHz)
E2-Hi (Motorola Type II VHF 136-174 MHz) *
E2-UHF (Motorola Type II UHF 406-512 MHz) *
E1 (Motorola Type I and Hybrid) **
Ed (EDACS
®
Wide Band: 9600 band)***
Ed SCt (EDACS Scat)
Lt (LTR)
* Requires programming of a Base and Spacing frequency Offset channel (See page 45).
** Requires programming of a Fleet map (See page 44).