


Power and extension cords
♦ Do not allow anything to rest on the power cord.
♦ Do not locate this product where persons will walk on the cord.
♦ Use the proper power cord with correct attachment plug type. If the
power source is 120V AC, use a power cord that has UL and C-UL
approvals, If the power source is a 240V AC supply, use the tandem (T
blade) type attachment plug with ground conductor power cord that
meets the respective European country’s safety regulations, such as VDE
for Germany.
♦ Do not over load wall outlets or power cords. Ensure that the total of all
units plugged into the wall outlet does not exceed 10 amperes.
♦ Ensure that the total ampere ratings on all units plugged into the extension
cord is not above the cord’s rating.
♦ If the power supply cord, which came with your monitor, is to be
connected to the PC instead of the wall outlet, Use an UL/TUV approved
computers with receptacle rated 100~240V AC, 50/60Hz, 1.0A(minimum)
only.
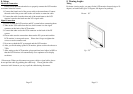
Environment
♦ Place the monitor on a flat and leveled surface.
♦ Place the monitor in a well-Ventilated place.
♦ Keep the monitor away from:
♦ Overly hot, cold or humid places, places directly under sunlight, dusty
surroundings, equipment that generate strong magnetic fields.
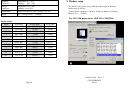
♦ Please adjust the frequency to 75 Hz after setting up the LCD monitor.
♦ Then push the OSD menu button and use the Auto Adjust function to find
the best mode of your computer.
Page 4
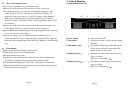
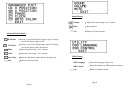
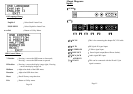
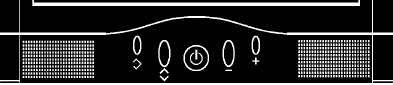
2. Control Function
Control Button Front View
﹝2﹞ ﹝3﹞ ﹝1﹞ ﹝4﹞ ﹝5﹞
1.Power Switch :
Power switch & LED.
2. Auto adjust :
Select this function to obtain the best display
efficiency
3.OSD menu / select :
Pressing this button pops up the OSD menu
on the screen Add used to select the OSD
control options on the screen.
4.Adjust (decrease-)
:
This button is used to adjust the decreasing
value of selected.
OSD off is volume adjust -
5.Adjust (increase+):
:
This button is used to adjust the increasing
value of selected.
OSD off is volume adjust +
Page 5