ViewSonic VNB130/VNB140 1
System Startup
1. Remove all packing materials.
2. Place the computer on a stable surface.
3. Securely attach any peripherals you want to use with the
computer (e.g. keyboard and mouse) to their ports.
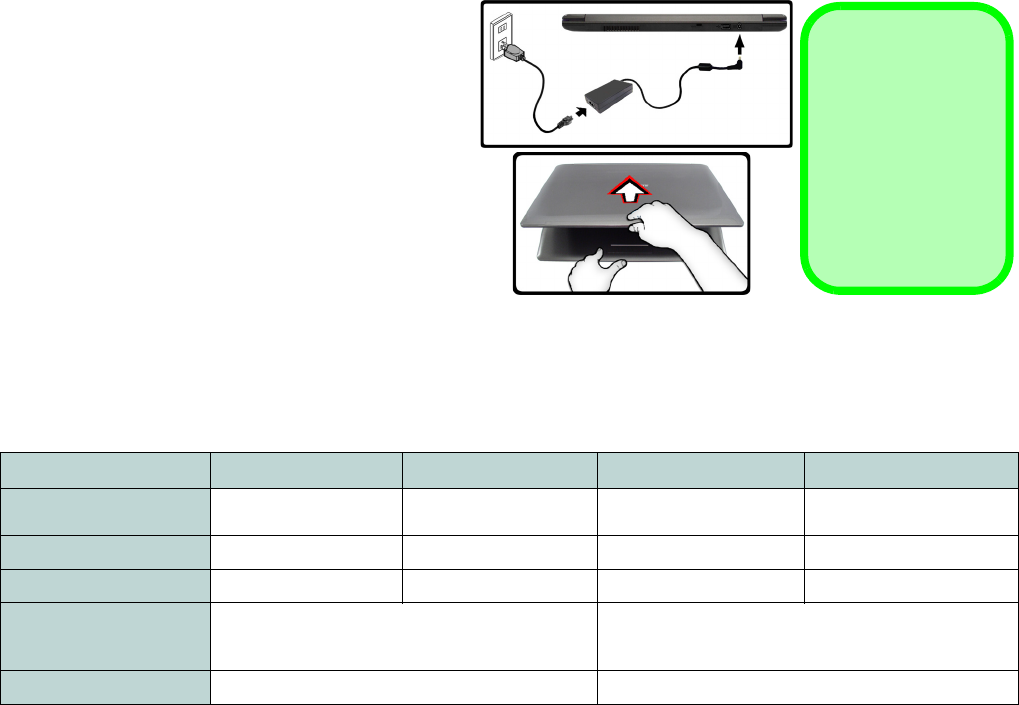
4. Attach the AC/DC adapter to the DC-In jack at the rear of
the computer, then plug the AC power cord into an outlet,
and connect the AC power cord to the AC/DC adapter.
5. Use one hand to raise the
lid/LCD to a comfortable viewing
angle
(do not exceed 120 degrees)
;
use the other hand
(as illustrated in Figure 1) to support the base of the
computer (Note: Never lift the computer by the lid/LCD).
6. Press the power button to turn the computer “on”.
Model Differences
This notebook series includes Two different model types which differ slightly in design style and LCD size. The models
differ as indicated in the table below. Note that your model’s color may appear different from those pictured throughout
this manual.
Table 1 - Model Differences
Feature VNB130 VNB130 VNB140 VNB140
Core Logic
Intel®) GS40 + ICH9M-
SFF Chipset
Intel® GS45 + ICH9M-
SFF Chipset
Intel® GS40 + ICH9M-
SFF Chipset
Intel® GS45 + ICH9M-SFF
Chipset
Video Adapter
Intel® GMA 4500M Intel® GMA 4500MHD Intel® GMA 4500M Intel® GMA 4500MHD
Memory
DDR3 800MHz DDR3 1066MHz DDR3 800MHz DDR3 1066MHz
Dimensions & Weight
330mm (W) * 221mm (D) * 23mm (H)
12.99” (W) * 8.7” (D) * 0.91” (H)
1.45 kg/3.19 lb (full system)
340mm (W) * 231mm (D) * 23mm (H)
13.39” (W) * 9.09” (D) * 0.91” (H)
1.5 kg/3.3 lb (full system)
Display Type 34cm/13.3" HD TFT LCD 36cm/14.0" HD TFT LCD
Figure 1 - Computer with AC/DC
Adapter Plugged-In
Shut Down
Note that you should
always shut your
computer down by
choosing Shut Down
from the Start Menu
in Windows 7. This
will help prevent hard
disk or system
problems.


