16 17
7. Internet connection
7.1 Connecting to a local network
Contact your Internet
service provider for more
information about the setting
of IP and DNS.
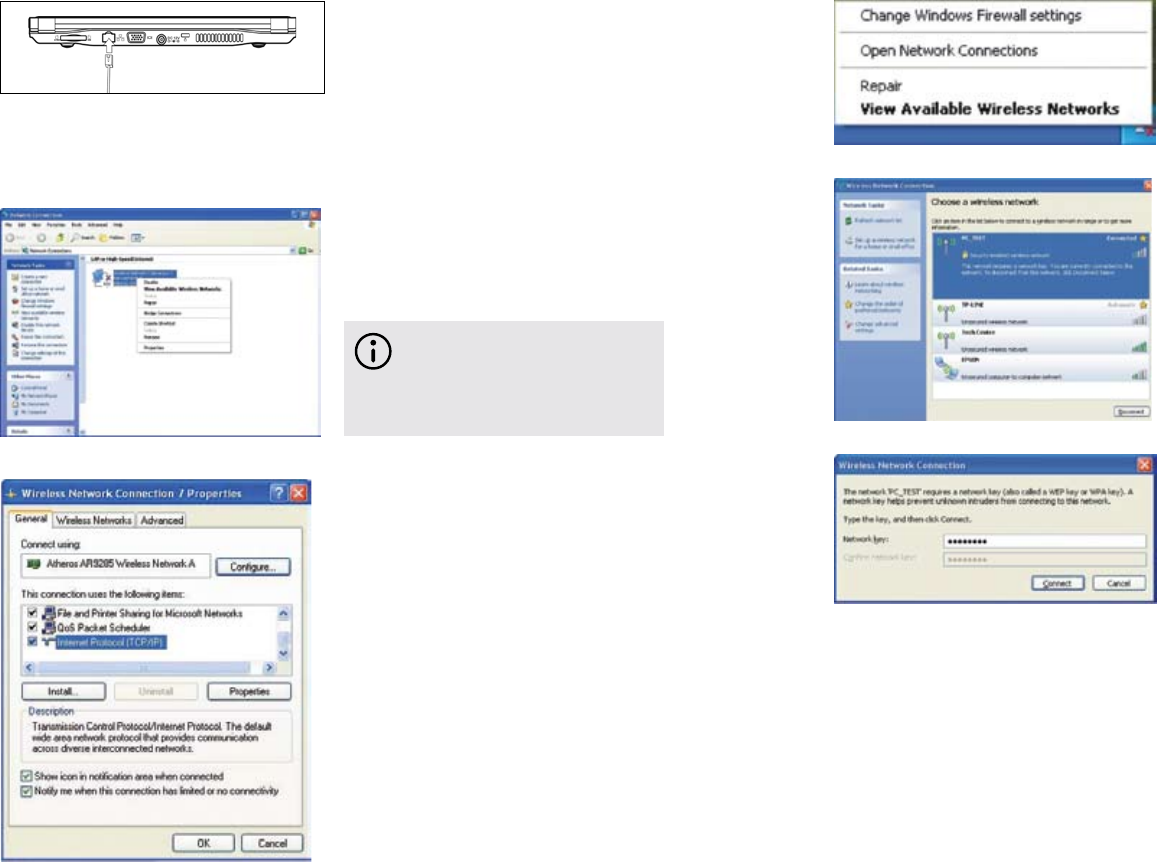
Right-click on ‘Local Area •
Connections’ then left click
on ‘Properties’ to display the
menu of ‘Local Area Connection
Properties’, as shown left.
On the ‘Local Connections •
Properties’ menu, left click on
‘Internet Protocol (TCP/IP)’, then
left click on ‘Properties’ to enter
the ‘Internet Protocol TCP/IP
Properties’ window.
Select ‘General’ and enter the •
address of your IP and DNS
(Domain Name), or select ‘Obtain
an IP address automatically’.
7.2 Setting the network system
Click on ‘My Network Places’, •
then left click on ‘Properties’ to
enter the ‘Network Connections’
window, as shown left.
When connecting to a network, •
make sure the network system is set
up first, before connecting the LAN
line to your Freedom Mini-laptop.
7.3 Wireless LAN
To see the available wireless •
networks, simply left click
on ‘Refresh’ and a list will be
displayed. You can find out
more about each of the wireless
networks shown by selecting
them with your mouse. Some
networks are likely to ask you
for a password before you can
connect to them.
Click <Fn>+<F2> to switch your •
wireless network on or off. When
your wireless network is on, the
Wi-Fi indicator turns green and
the Wi-Fi icon is displayed on the
bottom right of the desktop.
Right click your mouse on the •
Wi-Fi icon, then left click on ‘View
Available Wireless Networks’ on
the pop-up menu or double left
click on the Wi-Fi icon to enter the
‘Wireless Network Connection’
window as shown left.
