


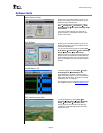


Audio Advantage Amigo
Page 11
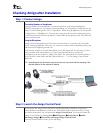
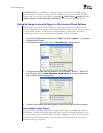
Checking Amigo after Installation
Step 1: Connect Amigo
Connecting Speakers or Headphones
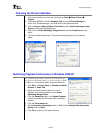
You can connect stereo headphones or powered speakers to the Amigo Headphone-
S/PDIF Output jack. If you connect powered speakers, set the Speaker Configuration in the
Amigo Control Panel Speaker Tab to “2 Speakers”. When using headphones, set the Speaker
Configuration to “Headphones”. To mute the sound, press the external volume/mute lever,
or click the mute button below the Master Volume slider in the Speakers Tab. The LED will
turn red when muted.
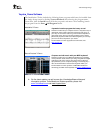
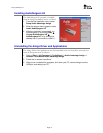
Using the Microphone
Amigo’s internal microphone can be used to record sounds or to monitor the room while
you’re wearing headphones. That way, you can listen to music without disturbing others, and
still hear what’s happening around you.
You can also connect an external microphone to the Mic Input jack. For instance, if you’re
using a headset with a microphone (e.g. when using Internet Phone), connect the
microphone from the headset to Amigo’s mic input. The microphone level and sensitivity is
set by the Mic volume slider and Mic Options button (“…”) in the Amigo Control Panel
Mixer tab.
⇒ AudioSurgeon can be used to record from the mic input and edit the recording. See
the later section in this manual for details.
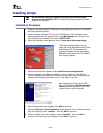
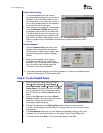
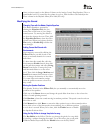
Step 2: Launch the Amigo Control Panel
At this point, the Amigo drivers should be installed and Amigo should be connected to
either speakers or headphones. Click on the Turtle Beach icon in the System Tray to bring
up a menu from where you can launch the Amigo Control Panel. You can also launch the
Amigo Control Panel by clicking Start Æ All Programs Æ Turtle Beach Æ Audio
Advantage Amigo Æ Run Audio Advantage Amigo Control Panel.
Once the Control Panel is active, do the following: