


6 Chapter 2
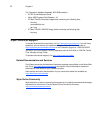
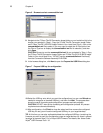
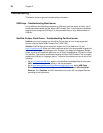
Figure 6 Browse to select commandsXml.xml
8. Navigate to the Z Class ThinOS Conversion Image folder on your hard drive (this is the
location you selected in "Step 1: Copy the Z Class ThinOS Conversion Image Folder
and Z Class ThinOS 3.0D BIOS Image Folder to Your Local Hard Drive"), click on the
commandsXml.xml file to select it (you may need to select the All Files option from
the Files of Type box to display the commandsXml.xml file for selection), and then
click Open.
CAUTION: Be sure to use the commandsXml.xml file you extracted in "Step 1: Copy
the Z Class ThinOS Conversion Image Folder and Z Class ThinOS 3.0D BIOS Image
Folder to Your Local Hard Drive." DO NOT use the commandsXml.xml file directly
from the Conversion Software Assembly DVD-ROM.
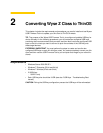
9. In the browse dialog box, click Next to open the Prepare the USB Drive dialog box.
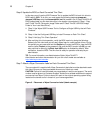
Figure 7 Prepare USB key for configuration
10.Select the USB key onto which you want the configurations (you can use Refresh as
needed to recognize an inserted USB key), and then click Next. The progress bars
show the overall (formatting and configuration) progress and task progress.
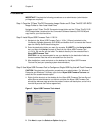
CAUTION: DO NOT interrupt the formatting and configuration process. All process
requirements are done automatically.
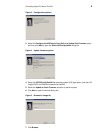
11. After configuration, click Finish to close the wizard and then remove the configured
USB key for use (you will use the configured USB key on your target devices).
TIP: At this time you can also replicate/duplicate the configured USB key (containing the
firmware you want to push) for simultaneous usage on target devices (by users in several
locations at the same time). For full Wyse USB Firmware Tool details, see Users Guide:
Wyse
®
USB Firmware Tool 1.19.