


Page 32 Xerox Document Centre User Guide
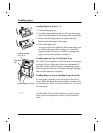
Getting a Secure Print (for ST models)
Follow these steps to get a secure print.
At the Workstation
1. In the Windows print driver, click Properties to get to
a Document Centre Print Driver.
2. Once in the Document Centre Print Driver select the
Paper/Output Tab and click the Job Type pull down
menu.
3. Select Secure Print.
4. Select Secure Print Setup, enter a 4-Digit Secure
Print ID then click OK.
5. When you are ready to retrieve your secure print job
go to the Document Centre.
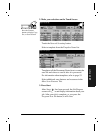
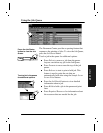
At the Document Centre
1. Press the Job Status button to display the job queue.
Touch your held job on the touch screen. It should be
easily identified by the file name.
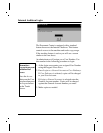
2. This will display a screen with additional options.
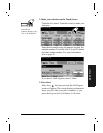
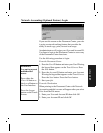
3. Press Release Job. You will be prompted for the
Secure Print ID you assigned the job at your
workstation.
4. As soon as the correct Print ID is entered, your job
will print.