


13.2 <
Maintenance>
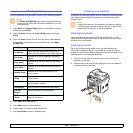
Clearing memory
You can selectively clear information stored in your machine’s memory.
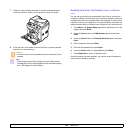
1 Press Menu until System Setup appears on the bottom line of the
display and press Enter.
2 Press the Scroll buttons until Clear Setting appears and press
Enter.
3 Press the Scroll buttons until the item you want to clear appears.
The options in the coloured cells are available only with Phaser
6110MFP/XN.
4 Press Enter when Yes appears.
5 Press Enter again to confirm clearing.
6 Repeat steps 3 through 5 to clear another item.
7 Press Stop/Clear to return to Standby mode.
Caution
•For Phaser 6110MFP/XN users, before clearing the memory,
make sure that all fax jobs have been completed, or you will
lose those jobs.
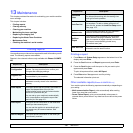
Options Description
All Settings
Clears all of the data stored in memory and
resets all of your settings to the factory default.
Fax Setup
Restores all of the fax options to the factory
default.
Copy Setup
Restores all of the copy options to the factory
default.
Scan Setup
Restores all of the scan options to the factory
default.
System Setup
Restores all of the system options to the
factory default.
Network
Setup
Restores all of the network options to the
factory default.
Phone Book Clears all of the fax number and email address
entries stored in memory.
Sent Report Clears all records of sent faxes and emails.
Fax Rcv
Report
Clears all records of received faxes.
NetScan
Report
Clears the information on network scan
sessions in memory.
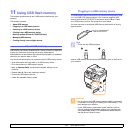
Cleaning your machine
To maintain print and scan quality, follow the cleaning procedures below
each time the toner cartridge is replaced or if print and scan quality
problems occur.
Cleaning the outside
Clean the cabinet of the machine with a soft lint-free cloth. You can
dampen the cloth slightly with water, but be careful not to let any water
drip onto or into the machine.
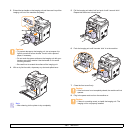
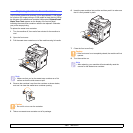
Cleaning the inside
During the printing process, paper, toner, and dust particles can
accumulate inside the machine. This buildup can cause print quality
problems, such as toner specks or smearing. Cleaning the inside of the
machine clears or reduces these problems.
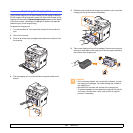
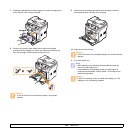
1 Turn the machine off and unplug the power cord. Wait for the
machine to cool down.
2 Open the front cover and pull the imaging unit out of the machine
using the handle on its bottom.
Caution
• Cleaning the cabinet of the machine with cleaning materials
containing large amounts of alcohol, solvent, or other strong
substances can discolour or distort the cabinet.