27
CHAPTER2 Ethernet Unit
2-10 Making a connection with TELNET.EXE
A typical Windows PC has a TELNET terminal called TELNET.EXE as standard equip-
ment. The following briefly explains how to make a connection using TELNET.EXE.
Preconditions are a controller IP address of 192.168.0.2, a port No. of 23, and all other
dedicated TELNET parameters at their default values.
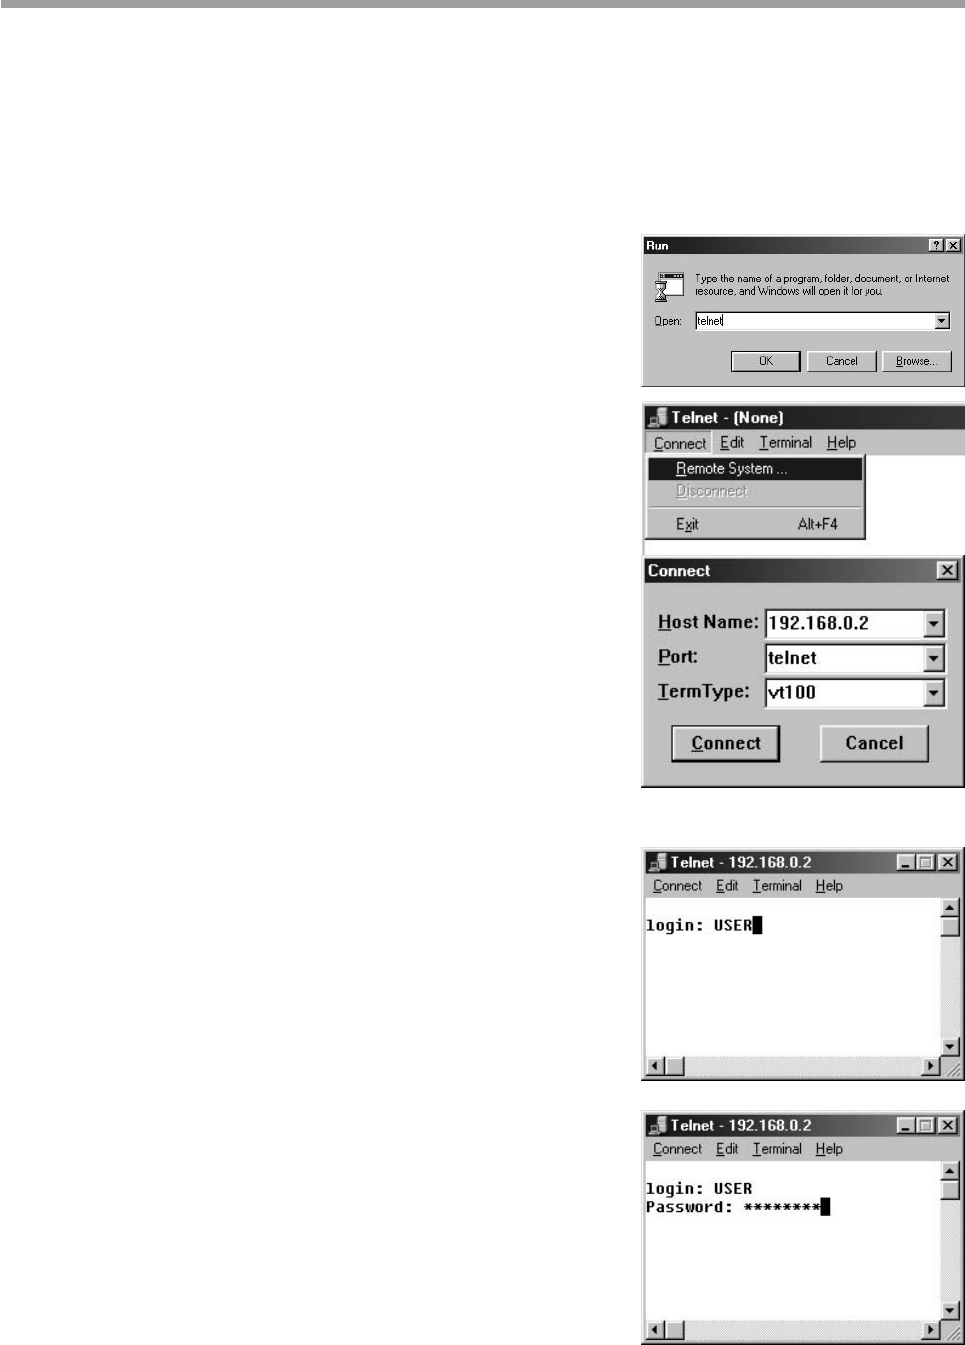
1) Click the “Start” button and select “Run”
to open the file name input window. En-
ter “telnet” here and then press the “OK”
button.
2) The telnet.exe now starts up, so select
“Remote System” from the Connect”
menu.
3) A menu screen for choosing the connec-
tion destination now appears. Enter the
controller IP address in the Host Name
box and enter the controller port No. in
the Port box. When finished, click the
“Connect” button.
* In this example, 192.168.0.2 is entered
in the Host Name box. There is no need
to enter anything in the Port box (Here,
“telnet” signifies Port No. 23.)
4) The PC now connects to the controller and
the login check is made. Enter the user
name here.
* In the example shown here, type in
“USER” and press the Enter key. If set
to “no login check”, no password mes-
sage appears following this message.
5) Next, enter the password. The characters
you enter appear as asterisks (*) on the
screen.
* In the example shown here, type in
“PASSWORD” and press the Enter
key.


