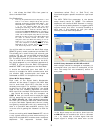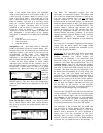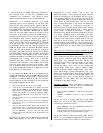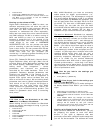
8) – this allows the Motif ES’s front panel to
control the Motif Rack.
Port Explanation:
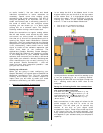
• You may be puzzled here as to why Port 11 and
Port 8 – If it were a simpler setup with just the
Motif ES controlling the Motif Rack Editor – the
Motif ES has 4 possible Ports 1, 2, 3 and 4. Port
1 is for the internal Motif ES (the Kbd
sending/TG receiving)/ Port 2 could be for any
PLG150 Boards or external devices/ Port 3
would be the General Remote port/ and Port 4
would be available to control an external DAW
mixer. So in this simpler setup Port 3 out of the
Motif ES and Port 3 back to the Motif ES would
be used to remote control the Rack. The
computer sees the Motif ES coming in on its
Ports 9, 10, 11 and 12. So the
third port is 11
(IN). The computer is sending back out to the
Motif ES on its 6, 7 and 8. So the
third port out
is 8. That’s why Ports 11 and 8.
You will be able to control the Motif Rack when
REMOTE (green) mode is selected on the Motif ES.
This allows you to recall Voices, edit volumes, pan
position, EQ, etc., the current MIX and see all the
pertinent parameters in the screen of the Motif
ES. The MIDI IN and OUT Ports are set to Port 3
(Port 3 is MIDI-B on the back panel of the 01X).
Any track assigned in your computer sequencer to
IN PORT 9 (comes from the Motif ES keyboard)
and OUT PORT 3 will playback on the Motif Rack.
It should be mentioned here that MIDI A, of
course, is available for MIDI communication with
yet another MIDI module/synth and would be
addressed as PORT 2 in this particular setup.
Other MIDI Setup Notes:
Each track of the Digital Audio Workstation
software will be setup to receive (IN) MIDI data
and to echo back (send OUT) the data to the
selected tone engine. For example, if you wanted
to play Part 14 of the Motif Rack Multi, you would
need to set your software sequencer to receive
MIDI input from the Motif ES’s keyboard controller
- that would be coming into the computer via
PORT 9. And you would need to send the signal
OUT by assigning the track to send OUT to PORT
3/ MIDI channel 14. Each software sequencer
will allow you to select a PORT and a MIDI channel
on a per track basis. Spend some time on routing
and getting comfortable with this networking of
data. It is just MIDI data and MIDI routing – but
is at the core of getting the ‘Network’ to work for
you.
A note on working with Local Control OFF: this is
a very typical method to work when working in a
setup with multiple MIDI modules and a computer
sequencer. The sequencer “echoes back”
(sometimes called “Thru” or “Soft Thru”) the
signal and targets a specific module on a per track
basis.
The MIDI THRU Port parameter in the device
setup should remain at “NONE”. The software
sequencer will handle all MIDI Channel re-routing.
If you find that pressing buttons is triggering MIDI
note-on events, this “error” is usually caused by a
MIDI loop. If this happens go over your setup
carefully to track down the problem.
AUDIO Setup between mLAN16E and 01X
Audio setups should be changed as necessary to
accomplish what you want to accomplish at the
time. One setup will not necessarily suffice for
every task.
In the above setup we are set to show how the
mLAN16E can be routed to the 01X on 16 buses
(14 + 2). Notice that to follow signal flow the
output signal is always the same color as the
9


