Chapter9—Track and virtual track operations
148 — Operation Guide
To defeat muting of tracks 1–16, you must first reduce the number of record-
ready tracks to eight tracks or fewer, and then use the TRACK screen TR View
page ([TRACK] key → [F1] key) to manually un-mute each track. (For details refer
to Reference Guide “TRACK screen.”)
By pressing the [ALL SAFE] button in the level meter/counter section, you can
cancel record-ready/mute status for all tracks at once. It is convenient to use this
method as a shortcut when you wish to quickly cancel the mute settings and re-
do the settings.
❍ Virtual tracks
These are “virtual” tracks from which you can select. On the AW4416, recording
and playback will occur on the virtual track 1–8 that you select for each audio
track 1–16.
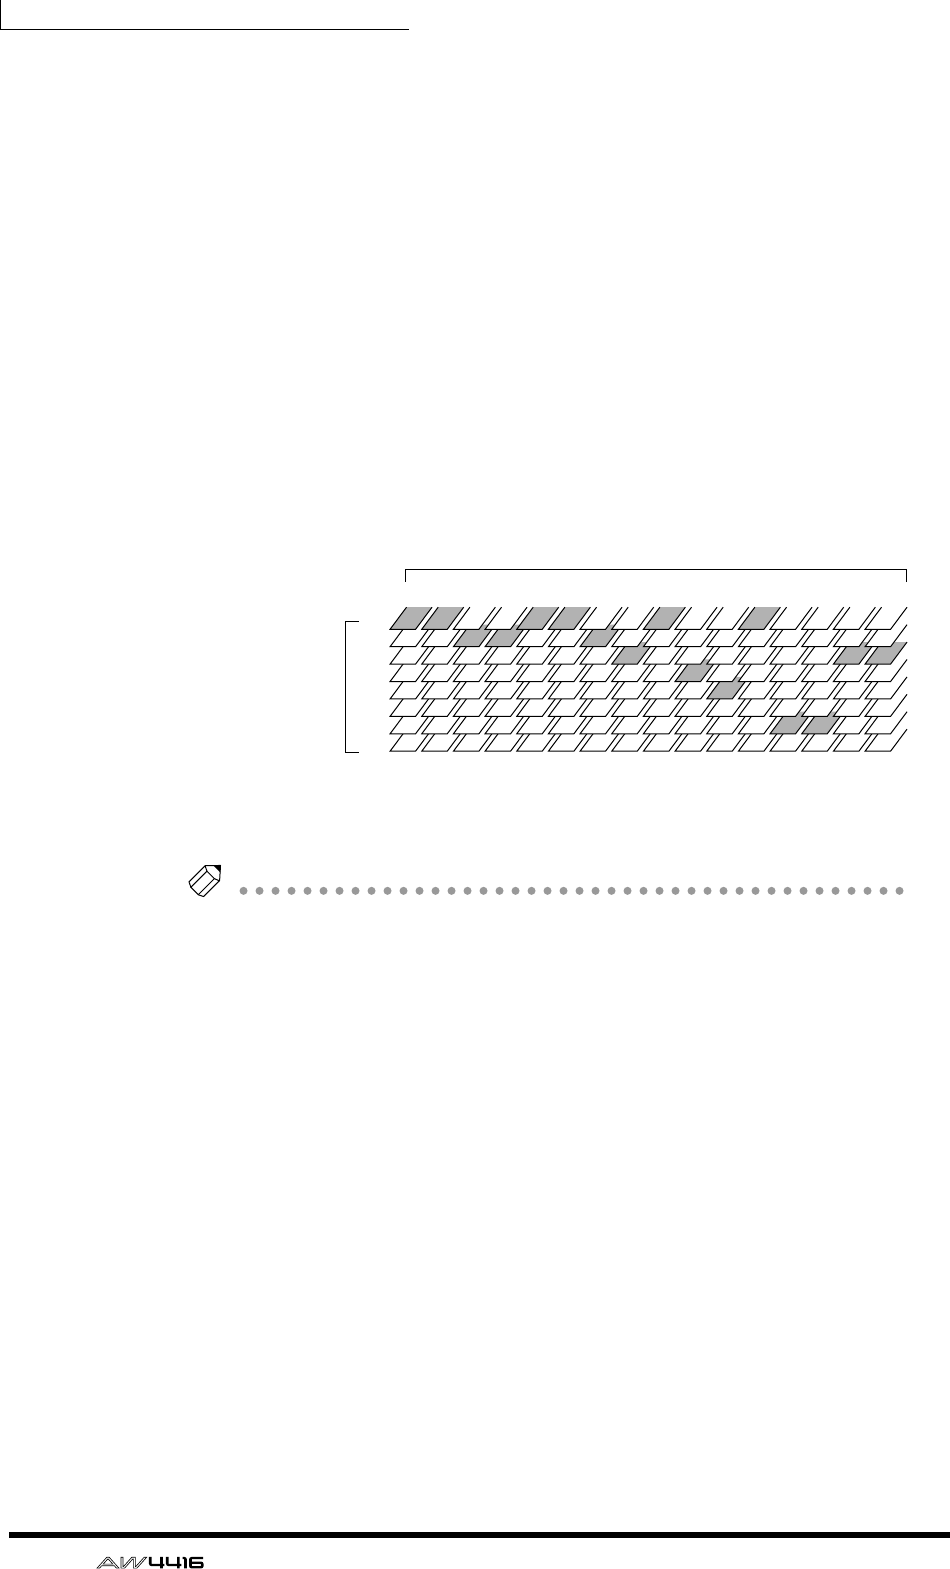
The following diagram shows the concept of virtual tracks. The horizontal rows
represent audio tracks 1–16, and the vertical columns represent virtual tracks 1–
8. The shaded areas indicate the virtual tracks that are currently selected for
recording and playback.
For example if you are recording a solo part on a certain track, you can switch
virtual tracks to record multiple takes, and select the best take later.
Tip!
In the initial state of the AW4416, virtual track 1 is selected for all tracks.
❍ Stereo track
This is a stereo track that is independent of the audio tracks, and is used mainly as
a master track to create a two-track mix. The AW4416 provides one stereo track
for each song.
The input of the stereo track is internally connected to the stereo bus, so that you
can record the signal of the stereo bus at any time simply by putting the stereo
track in record mode. At this time, recording on the normal audio tracks 1–16
will not be possible. These tracks will only play back.
When you play back the stereo track, the output of the stereo track is automati-
cally assigned to monitor channels 1/2. At this time, all of the normal audio tracks
will be muted.
1
2
3
4
5
6
7
8
1
2 3 4 5 6 7 8 9 10 11 12 13 14 15 16
Virtual tracks
Audio tracks


