


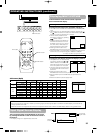
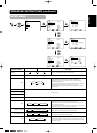


1030 (40-9/16)
700 (27-9/16) 300 (11-13/16)
124
(4-7/8)
89
(3-1/2)
636 (25-1/16)
713 (28-1/16)
77
(3)
397 (15-5/8)
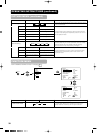
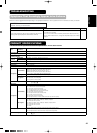
Usage cautions
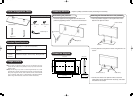
Dimension diagram
■ Do not allow an adhesive material, such as an adhesive tape, into
contact with the surface of the pedestal, as they may cause the exterior
surface to peel.
■ Wipe off dirt using a dry cloth. To remove ingrained dirt, use a cloth
saturated with a diluted neutral detergent solution and squeezed until
damp. Use of organic solvents, such as benzine, thinner, and household
wax, for cleaning could result in a degenerated or discolored material.
(When using a chemical duster, observe the relevant instructions.)
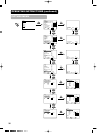
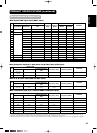
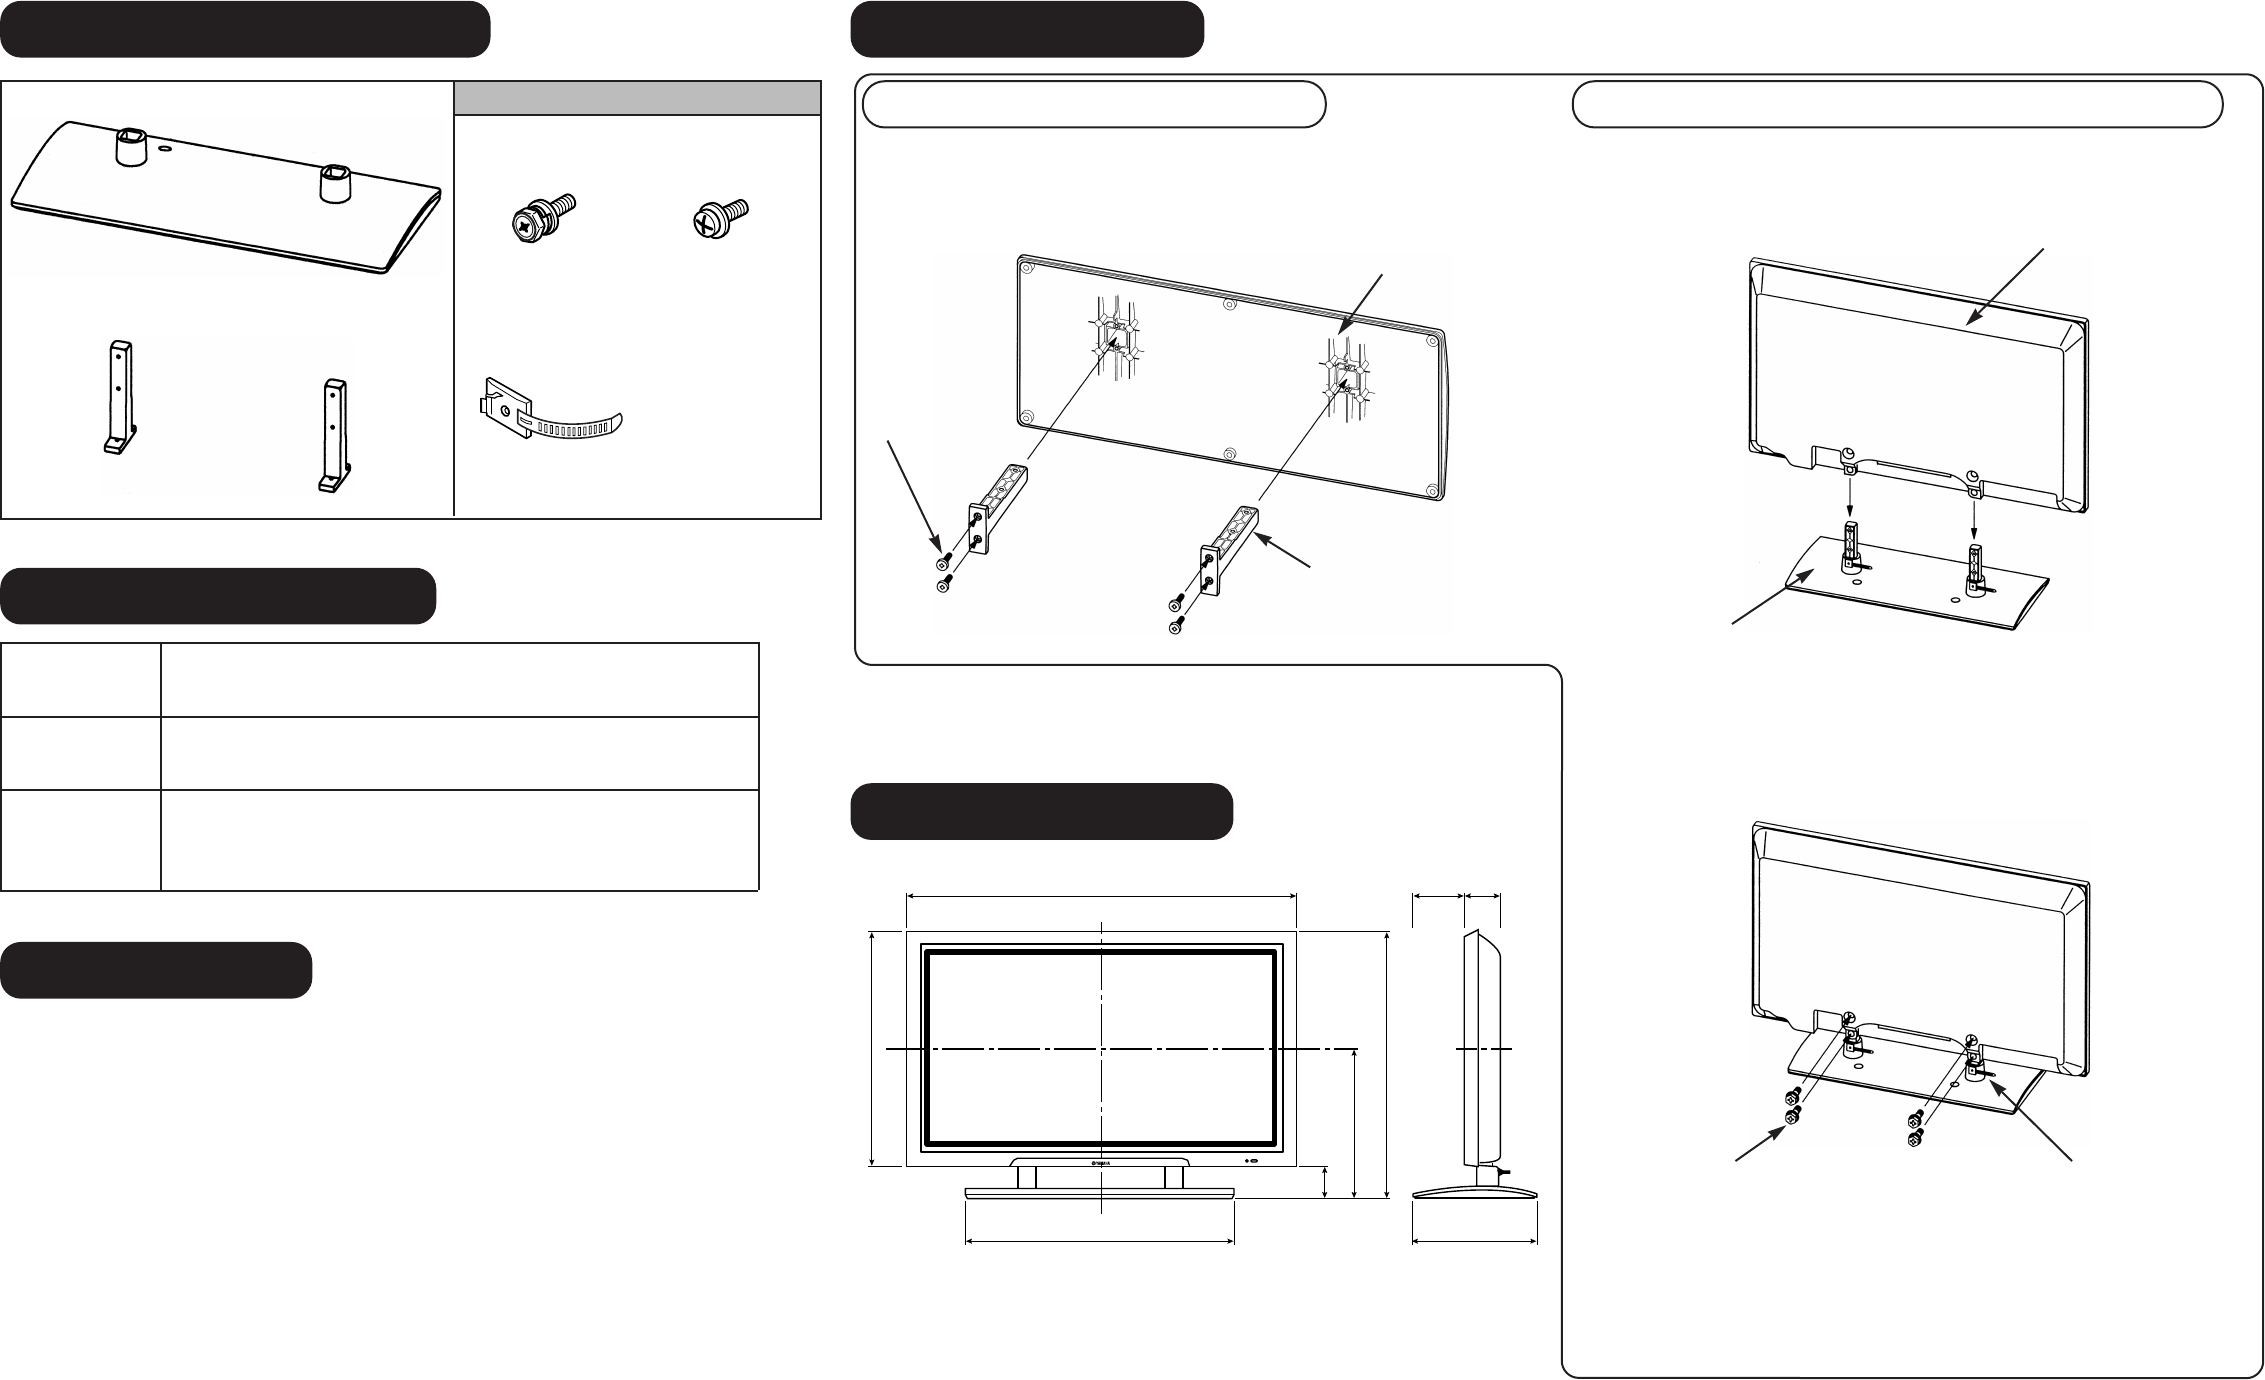
Assembly Method
Prepare a phillips screwdriver before proceeding with assembly.
Assembling the pedestal Attaching the Plasma Monitor to the pedestal
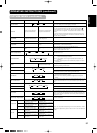
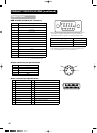
Product Specifications
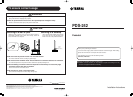
Parts Configuration Chart
Included in the parts package
M5
x
20 screws
x
4
M6
x
30 screws
x
4
Cable clamp
x
2
Pedestal base
x
1
Support
x
2
External
Dimensions
700 (W)
x
184 (H)
x
300 (D) mm
(27-9/16 (W) x 7-1/4 (H) x 35-7/16 (D) inches)
Weight
4.2kg
(9 lbs. 4 oz.)
Main material
/Surface
treatment
Pedestal base, Support : Aluminum alloy / Baked paint finish
1. Insert the support into the pedestal base and secure it in
position by tightening four M5
x
20 screws from the bottom.
Pedestal base
Support (2)
M5
x
20 screw
(4)
2. Insert the pedestal support into the square holes on the
bottom of the plasma monitor.
Plasma monitor
Pedestal
3. Fix the pedestal to the plasma monitor using four M6
x
30
screws.
M6
x
30 screw (4)
4. Connect the cables to the plasma monitor, attach the
cable clamps to the pedestal where necessary, and fasten
the cables to the clamps.
Cable clamp
Unit: mm (inches)
PDS-242_E 2003.12.11 11:23 2