


Installation and Setup
Printing a Test Card
980459-001 Rev. A P330i User’s Manual 23
Printing a Test Card
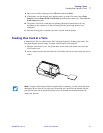
With ribbon and cards loaded, your P330i Printer is ready to print. To check the operation of
the printer, you should print a test card. (Printing a test card does not require that the printer be
connected to your computer or network, but power must be applied.)
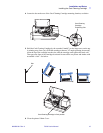
1. Set the printer’s power switch (on the back of the printer) to the OFF ( O ) position.
2. While pressing the Printer’s front panel button (next to the LCD display panel), switch the
printer ON (
| ).
3. Hold the panel button until the LCD display panel reads “SELF TEST”.
4. Release the panel button, and the test card will print.
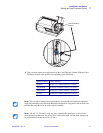
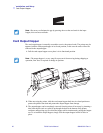
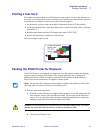
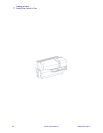
This is an example of the test card:
Packing the P330i Printer for Shipment
If the P330i Printer is to be shipped, it is important to use the original packing and shipping
material to prevent damage to the Printer. If the original material is lost, a replacement
Shipping Kit can be ordered from Zebra; please refer to the Media List on the Windows
Drivers and User Documentation CD supplied with this printer.
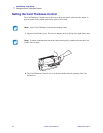
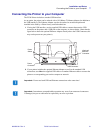
1. Remove cards in the card feeder:
a. While the printer still has power applied and is turned on, and is still connected to the
host computer, remove cards from the card feeder. The last card may be difficult to
remove. If so, use the Eject Card command available through the driver on the host
computer to eject the last card that is staged in the feeder.
b. Close the Card Feeder Cover.
PRINTER: P330iM
Serial N°: XXXXX
Firmware: XXXXXXX
Head resistance: XXXX
Offset: XXXX-XXXX
EC:XX
Printing counter: XXXXX
300 dpi
PLASTIC CARD PRINTER
TEST CARD
Note • The specifics of the shipment and the printer’s condition may influence which of the
following steps are followed; common sense should prevail.
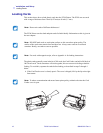
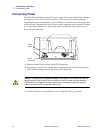
Caution • Do not physically pull the last card out of the feeder staging area. This could
damage the printer and void the warranty, as well as damage the card.