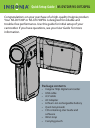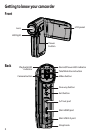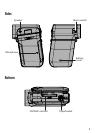
7
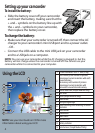
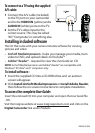
To take a picture:
1 Turn on your camcorder.
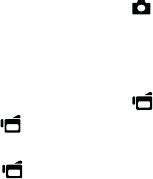
2 Aim the lens, then press
(Camera button).
3 Press the Exit button once to view the picture.
To record movies:
1 Turn on your camcorder.
2
Aim the lens, then press (Video
button
).
3 Press
(Video
button
) again
to stop recording.
4 Press the Exit button once to view the recorded movie.
5 Press
(Video
button
)
to play video.
To connect the camcorder to a computer:
1 Connect the supplied USB cable to your camcorder and to the
computer’s USB port, then turn on the camcorder. The record/
power LED lights and starts blinking if the battery is charging.
2 Windows® XP, Vista® or 7:
Open My Computer or Windows Explorer. If a card is inserted,
two new drives will appear in the drive list; otherwise, one new
drive (camcorder’s internal memory) will appear. The internal
memory drive will show up as DV. The card drive will show up as
whatever label the card shipped with or that you selected if you
formatted the card in your computer. If you erased the card in the
camcorder (see User Guide for details), the label will be DV-SD Card.
Mac OS® 10.x and higher:
Two new drive icons will appear on the desktop or in the sidebar.
The internal memory drive will show up as DV. The card drive
will show up as whatever label the card shipped with or that you
selected if you formatted the card in your computer. If you erased
the card in the camcorder (see User Guide for details), the label will
be DV-SD Card.
3 Double-click the drive you wish to view. Your movie and photo
fi les will be in the \DCIM\100MEDIA folder.