33
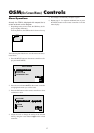
Setting the appropriate main menu display for the
system
Set the main menu display according to the connected
equipment (monitor only, selector).
Example: When a selector is connected (setting “SE-
LECTOR”)
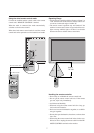
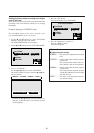
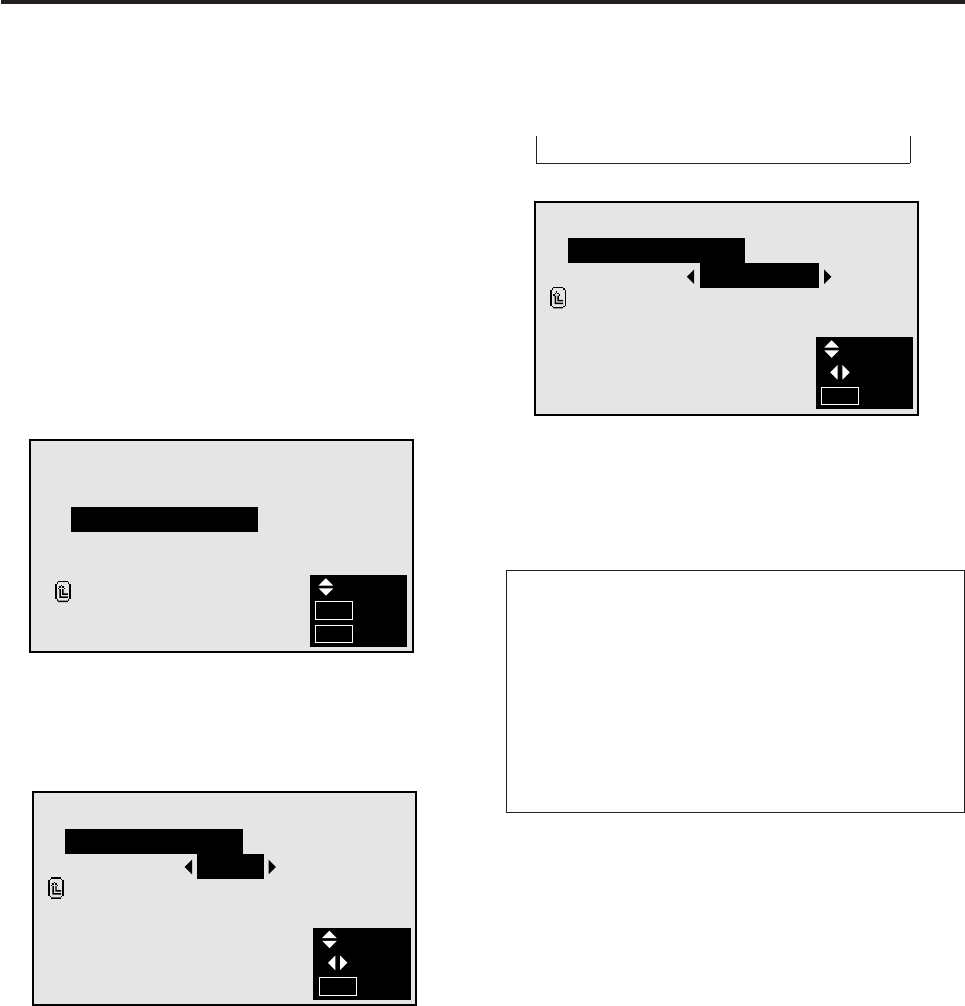
Press the MENU button on the remote controller to dis-
play the MAIN MENU on the screen, then...
1. Use the ▲ and ▼ buttons to select “INFORMATION”,
then press the “OK” button.
The “INFORMATION” screen appears.
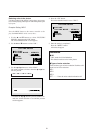
2. Use the ▲ and ▼ buttons to select “COMMUNICA-
TION”, then press the “OK” button.
4. To set to “ SELECTOR “ ...
Use the ᮤ and ᮣ buttons to select “SELECTOR”.
The mode switches as follows when the ᮤ and ᮣ but-
tons are pressed:
→ AUTO ↔ TUNER ↔ SELECTOR ↔ NO INPUT ←
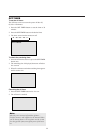
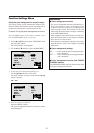
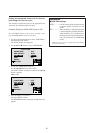
INFORMATION
FREQUENCY
COMMUNICATION
LANGUAGE
COLOR SYSTEM
RETURN
SEL.
OK
EXIT
OK
MENU
The “COMMUNICATION” screen appears.
3. Use the ▲ and ▼ buttons to select “COMMUNICA-
TION”.
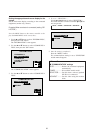
COMMUNICATION
COMMUNICATION
RETURN
AUTO:
SEL.
ADJ.
EXIT
MENU
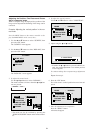
COMMUNICATION
COMMUNICATION
RETURN
SELECTOR:
SEL.
ADJ.
EXIT
MENU
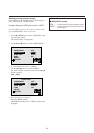
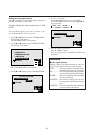
5. Once the setting is completed ...
Press the “MENU” button.
The communications setting is set to “SELECTOR”
and the menu disappears.
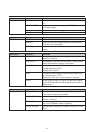
Information
Ⅵ “COMMUNICATION” settings
AUTO ................. Detects the connected equipment
automatically.
TUNER............... Not available on this model.
SELECTOR ........ Set this when a selector (optional
PX-SL1A) is connected.
NO INPUT .......... Set this when using the monitor
alone.