5
2. Installation
2.1 Mounting the NetController KVM Switch
2.2 Connecting Your PCs and Peripherals to a Single NetController KVM Switch
2.3 Daisy-Chaining B042-Series KVM Switches
The KVM Switch can be placed on a desktop or mounted in a standard 19” rack.
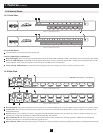
Step 1: Connect the console (shared USB or PS/2 keyboard, mouse and monitor) to the console connectors on the backside of the KVM Switch.
Note: For USB connection, separate keyboard and mouse connectors are required.
Step 2: Connect the included 9V DC power adapter cord to the KVM Switch to power it on.
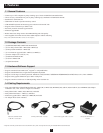
Step 3: Connect each computer to the KVM Switch using a P780 Series Tripp Lite USB PS/2 KVM Cable Kit. Not included.
The KVM Switch is now ready to operate as soon as you turn on any of the attached computers.
Note: When you are connecting a PS/2 computer, it is required that the B042-004,-008 or -016 KVM Switch is connected and powered on before starting your computers. The reason is because when
your PC is booting up, the PS/2 interfaces on the connected computer have to communicate with your keyboard and mouse and get a response from them. If your KVM switch has not been running and
is connected to your computer, it might have difculty recognizing the keyboard and mouse.
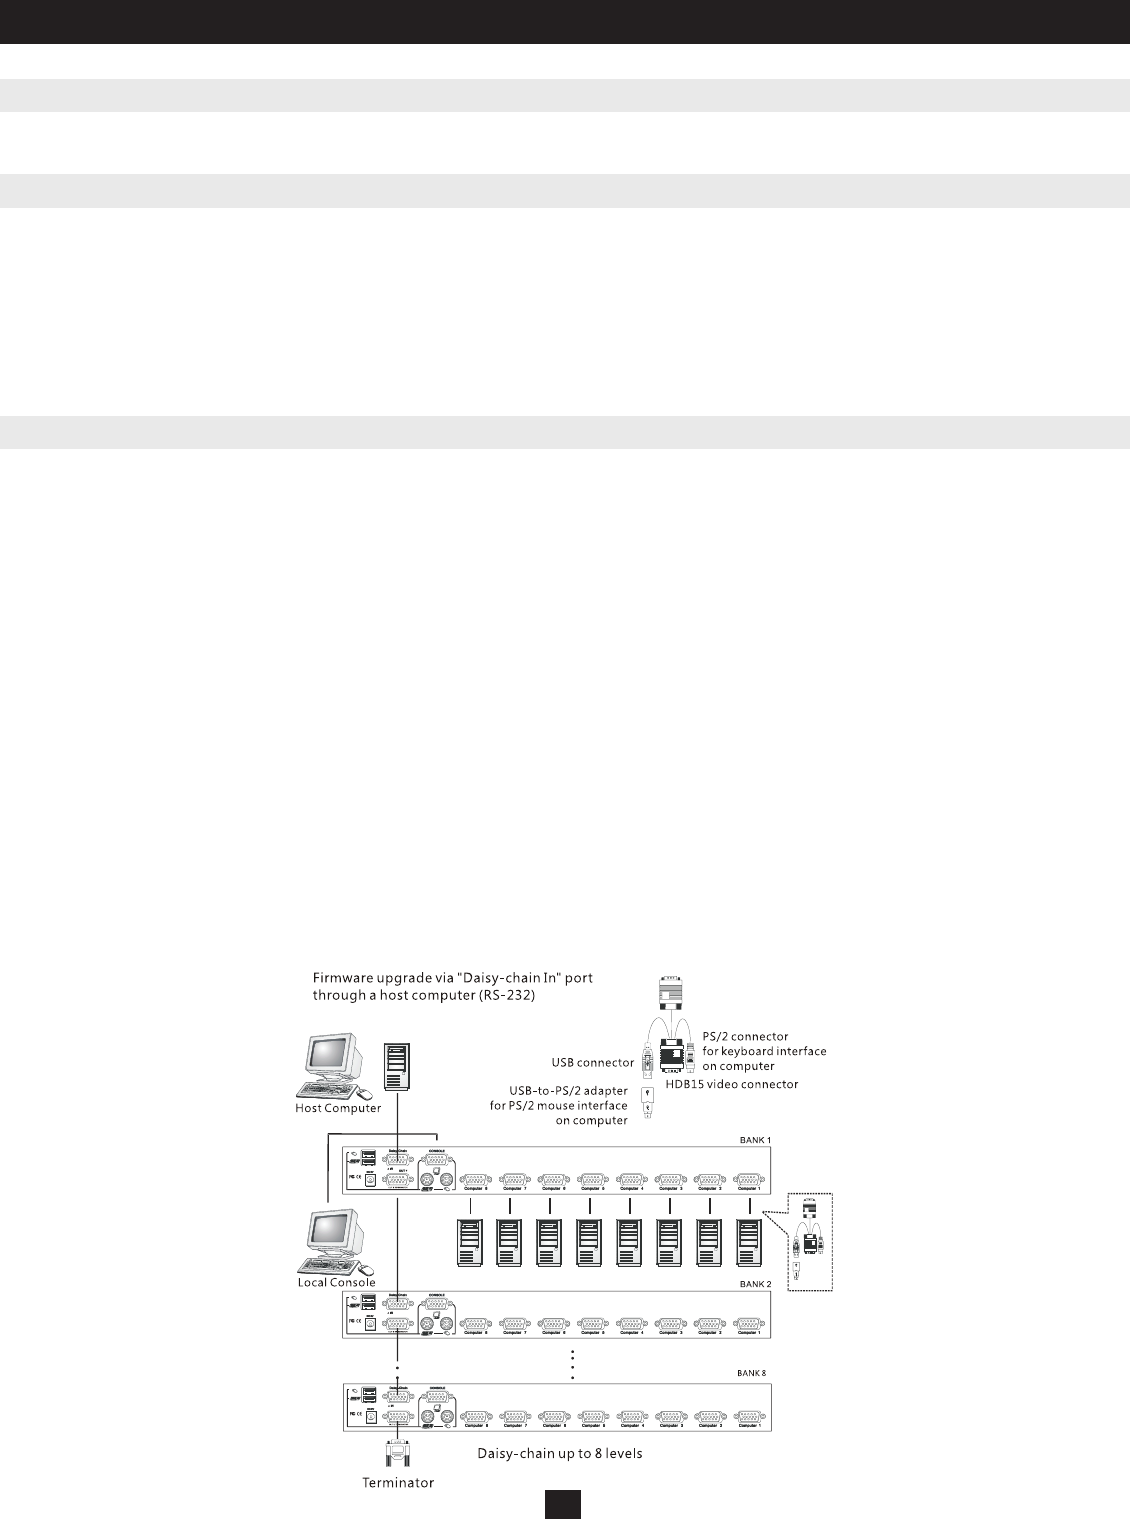
To maximize the number of connected computers, multiple B042-004,-008 or -016 KVM Switches can be daisy-chained together to connect up to a total of
128 computers (with 8 units of the B042-016 KVM Switch). The B042-Series KVM Switches that are to be daisy-chained do not have to be of the same port
capacity. You can daisy-chain any combination of B042-004,-008 or -016 KVM Switches to scale the port capacity with more flexibility. KVM controls can
then be extended to groups of computers connected on the daisy-chain of B042-Series KVM Switches.
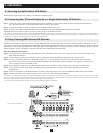
Daisy-chain Multiple KVM Switches
Step 1: Connect the console (shared USB or PS/2 keyboard, mouse and monitor) to the console port connectors on the rear panel of the master (first)
B042-Series KVM Switch.
Step 2: Connect the power adapter cord to the DC 9V power receptacle on the master KVM Switch and plug it in to a power source.
Step 3: Use the provided daisy-chain cable—HD15 (M) to HD15 (F)—to connect the daisy-chain OUT port of the master KVM switch to the
daisy-chain IN port of the second (downstream) B042-004,-008 or -016 KVM Switch. Then connect the power adapter cord to the DC 9V
power receptacle on the second KVM Switch.
Step 4: Follow the same procedure for any additional KVM Switches you would like to attach, creating a daisy-chain up to 8 KVM Switches.
Step 5: After you have set up the Daisy-Chain of KVM Switches, plug the daisy-chain terminator into the daisy-chain OUT port of the last
KVM Switch.
*
Step 6: Connect each computer to the KVM Switches in your daisy-chain using a P780 series Tripp Lite USB PS/2 KVM Cable Kit. Not included.
Step 7: The KVM Switches are now ready to operate as soon as you turn on any of the attached computers.
Note: When you are connecting a PS/2 computer, it is required that the B042-004,-008 or -016 KVM Switch is connected and powered on before starting your computer. The reason for this is because
when your computer is booting up, the PS/2 interfaces on the connected computer have to communicate with your keyboard and mouse and get a response from them. If your KVM switch has not been
running and is connected to your computer, it might have difculty recognizing the keyboard and mouse.
*
It is not necessary to attach the daisy-chain terminator if you are not daisy-chaining the switch to another KVM.
Figure 2: Daisy-Chain Diagram