


42 CHAPTER 3: SETTING UP FOR MANAGEMENT
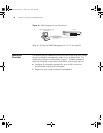
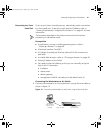
To connect the cable:
a Attach an RJ-45 connector at one end of the Ethernet cable to the
Network Interface Card (NIC) in the workstation.
b Connect the RJ-45 connector at the other end of the cable to one of
the front panel ports on the Switch.
Do not interconnect the Switch to any other unconfigured Switch.
Setting Up the Switch with IP Information
You are now ready to manually set up the Switch with IP information. You
can do this using the Web interface or the command line interface (CLI)
using telnet.
Using the Web Interface
1 Power-up the Switch. This takes approximately one minute.
2 Open a suitable Web browser and enter the IP address of your Switch in
the Address field.
If there is no response, wait for one minute then re-enter the IP address.
If a pop up message appears displaying download and install simplified
Chinese information, click Cancel.
3 At the login and password prompts, enter admin as your user name and
press Return and at the password prompt (default user name and
password) press Return again. If you have logged on correctly, the Device
View of the Switch is displayed.
4 To enter basic setup information for the Switch, select Administration > IP
Setup and then follow the wizard through various system screens to enter
the IP address and subnet mask that you want the Switch to use when it
is connected to the network. The final page displays a summary of the
information entered.
5 Select Save Configuration to save the configuration to your Switch.
The initial set up of your Switch is now complete and the Switch is ready
for you to set up your chosen management method. See “Methods of
Managing a Switch” on page 32.
10014914AA.book Page 42 Friday, July 7, 2006 2:08 PM