12 © 3M 2008. All Rights Reserved.
Installation 3M™ Digital Projector
Powering On the Projector
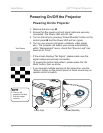
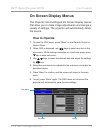
1. Remove the lens cap. n
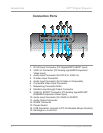
2. Ensure that the power cord and signal cable are securely
connected. The Power LED will turn red.
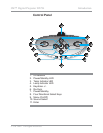
3. Turn on the lamp by pressing “Power/Standby” button on the
control panel.o And the Power LED will turn green.
4. Turn on your source (computer, notebook, video player,
etc.). The projector will detect your source automatically
within “Management” menu; check that “Source Lock” has
been set to “Lock”.
If the screen displays “No Signal”, please make sure the
signal cables are securely connected.
To access the built-in test pattern, please press the “AV
Mute” button, then up arrow.
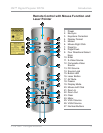
If you connect multiple sources at the same time, use the
“Source” button on the control panel or direct source key on
remote control to switch.
Powering On/Off the Projector
RE-SYNC
POWER/
STANDBY
Lens Cap
21
Power/Standby
Turn on the
SURMHFWRU¿UVWDQG
then the signal
sources.
Test Pattern


