Basic Configuration
2-3
2
Remote Connections
Prior to accessing the switch’s onboard agent via a network connection, you must
first configure it with a valid IP address, subnet mask, and default gateway using a
console connection, DHCP or BOOTP protocol.
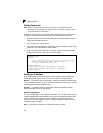
The IP address for this switch is obtained via DHCP by default. To manually
configure this address or enable dynamic address assignment via DHCP or BOOTP,
see “Setting an IP Address” on page 2-4.
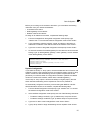
Note: This switch supports four concurrent Telnet/SSH sessions.
After configuring the switch’s IP parameters, you can access the onboard
configuration program from anywhere within the attached network. The onboard
configuration program can be accessed using Telnet from any computer attached to
the network. The switch can also be managed by any computer using a web
browser (Internet Explorer 5.0 or above, or Netscape Navigator 6.2 or above), or
from a network computer using SNMP network management software.
Note: The onboard program only provides access to basic configuration functions. To
access the full range of SNMP management functions, you must use
SNMP-based network management software.
Basic Configuration
Console Connection
The CLI program provides two different command levels — normal access level
(Normal Exec) and privileged access level (Privileged Exec). The commands
available at the Normal Exec level are a limited subset of those available at the
Privileged Exec level and allow you to only display information and use basic
utilities. To fully configure the switch parameters, you must access the CLI at the
Privileged Exec level.
Access to both CLI levels are controlled by user names and passwords. The switch
has a default user name and password for each level. To log into the CLI at the
Privileged Exec level using the default user name and password, perform these
steps:
1. To initiate your console connection, press <Enter>. The “User Access
Verification” procedure starts.
2. At the Username prompt, enter “admin.”
3. At the Password prompt, also enter “admin.” (The password characters are not
displayed on the console screen.)
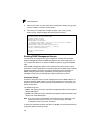
4. The session is opened and the CLI displays the “Console#” prompt indicating
you have access at the Privileged Exec level.


