Chapter 3 83
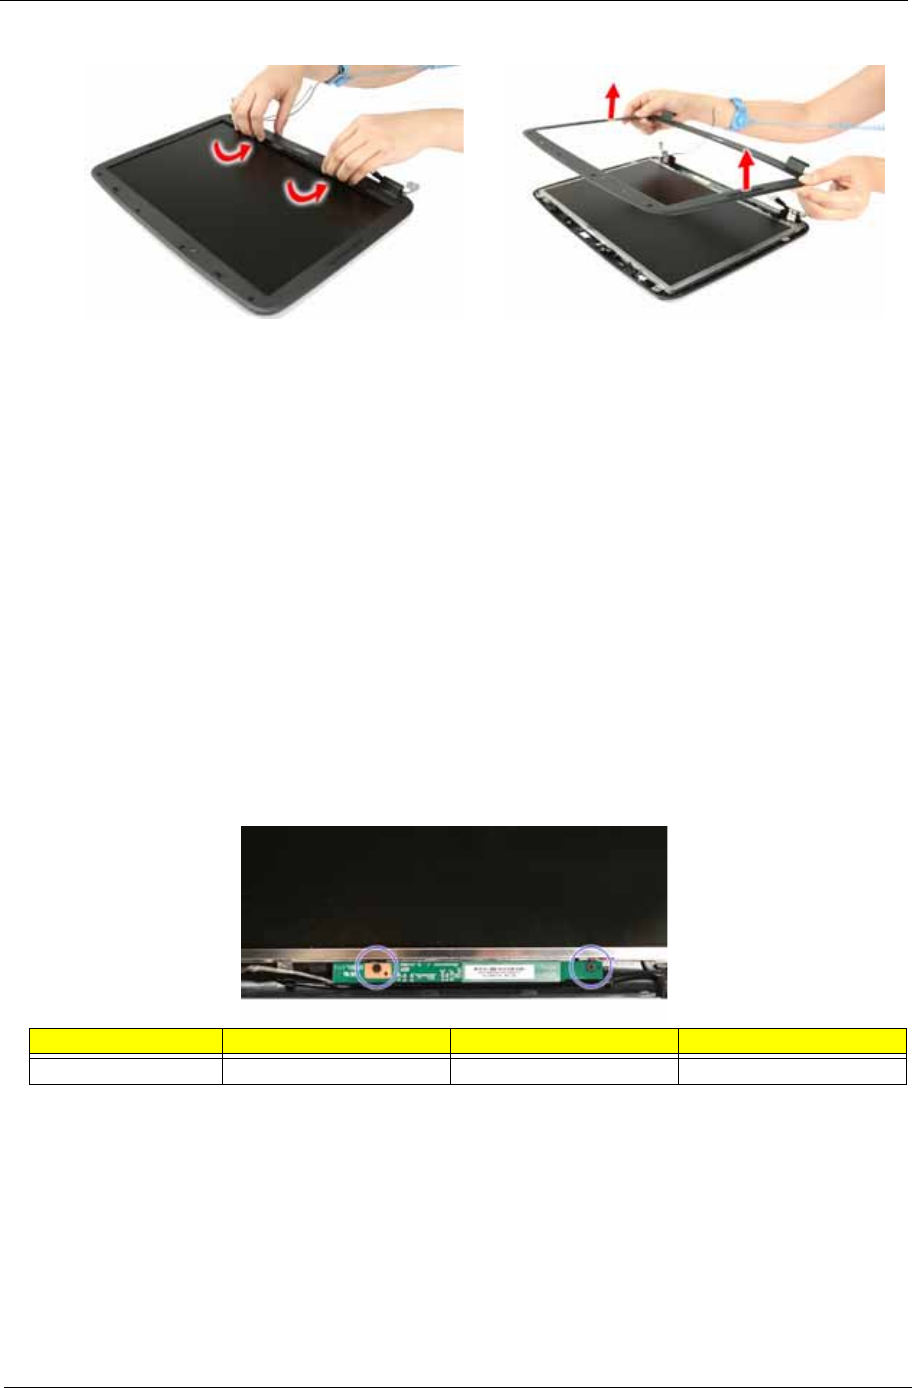
14. Carefully pry open the LCD bezel and remove the bezel from the LCD module.
Removing the Inverter Board
1. See “Removing the Battery Pack” on page 51.
2. See “Removing the Lower Cover” on page 53.
3. See “Removing the DIMM” on page 54.
4. See “Removing the WLAN Board Module” on page 55.
5. See “Removing the Hard Disk Drive Module” on page 56.
6. See “Removing the Optical Drive Module” on page 57.
7. See “Removing the CPU Heatsink Module” on page 60.
8. See “Removing the CPU” on page 61.
9. See “Removing the Keyboard” on page 62.
10. See “Removing the Middle Cover” on page 63.
11. See “Removing the LCD Module” on page 64.
12. See “Removing the LCD Bezel” on page 82.
13. Remove the screw (G) that holds the inverter board to the panel.
Step Size (Quantity) Color Torque
1~2 M2.5 x L6 (2) Black 3 kgf-cm


