


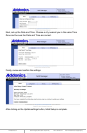


www.addonics.com Technical Support (M-F 8:30am - 6:00pm PST) Phone: 408-453-6212 Email: www.addonics.com/support/query/
When the wizard is complete by either choosing Automatic in Step 1 or completing
Steps 2 and 3, a confirmation page will appear. Clicking the Finish button will apply
the settings.
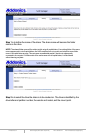
View Drive Information
Displays details of all connected drives. If network shares are configured for
drives that have been disconnected, those drives will also appear in this list as
unavailable.
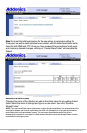
Device: The letter after “sd” is the drive's letter, in order of when the drive was first
encountered by the NAS unit. The number at the end of the device label is the
partition on the drive, in order of the drive's partition map.
Vendor: The drive's manufacturer.
Model: The drive's model number.
Mount Point: Used by the NAS unit internally.
Type: The file system the partition is formatted with.
Size: The total space of the partition.
Used: Space in use on the partition.
Available: Remaining space available on the partition.
% Used: Percentage of the partition space in use.
View User Samba and FTP Login Information
Displays a list of open sessions for file sharing of Windows sharing and FTP. The
login username, the computer's hostname and IP address are listed for each
session.
Format Drive
Formats a specific drive using a choice of ext3 or XFS file systems.
Caution: this function destroys data.
Choose a drive to format. If the drive is greater than 2TB in capacity choose the
GPT boot record, otherwise choose MBR. Finally, choose Linux EXT3 or Linux
XFS for the file system. After clicking Format Drive, the format utility will request
confirmation.
NOTE: For highest possible performance, use the XFS file system.
After clicking “Yes, I'm sure,” the format utility will create and prepare one partition
on the selected drive, using all space on the disk. A page will load next confirming
the format is in progress. This page updates once every minute. Once formatting
is complete, the page will change to state it is done. Click any of the tabs above
the message to perform other tasks. If desired, this can be done before formatting
is complete; however, the drive being formatted cannot be used until formatting is
done and there will be no further notifications.
Safely Remove Drive
Closes all pending I/O to a specified drive then “unmounts” it for removal.
Caution: best practice is to notify any and all users this will be done before
proceeding to prevent data loss. Abruptly removing a physical drive without
notifying users or using the Safely Remove Drive function may cause file system
corruption and loss of data.
Backup Internal System Configuration Information
Saves or restores all of the NAS unit's settings using a specified drive. Select the
volume desired for backups. If backups exist on that volume they will be listed
under Backups, with comments if present.
To create a backup, add a backup comment if desired then click Create Backup.
To restore an existing backup, select the desired backup and click Restore
Selected. The currently selected backup may also be deleted using the Delete
Selected button. All three functions will request confirmation before proceeding.
Reboot
Restarts the NAS unit.
Caution: best practice is to notify any and all users this will be done before proceeding
Upgrade the System Firmware
In the case of a firmware update release, this utility applies the update.
Update will not proceed unless only one volume (one partition on one drive) is
used for accessing the Web Interface as well as browsing for the shared folders
on the network.
Update FTP Port Number
Changes the TCP Port used by the FTP server. Default is port 21. Note that some
FTP clients will not be able to connect on alternate ports.
View Current Network Configuration
Displays details about the NAS unit's current network settings. Includes device
and network names as well as TCP/IP settings.
Configure the Network Settings
Starts the network configuration wizard.
Choosing Automatic will configure the NAS unit as a DHCP client and the
configuration wizard will skip to the end. Choosing Manual configuration will
proceed to Step 2.
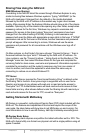
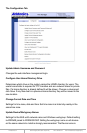
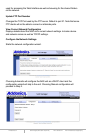
The Configuration Tab
Update Admin Username and Password
Changes the web interface management login.
Configure User Home Directory Drive
Determines which drive on the system carries the HOME directory for users. The
user's home folder is required for FTP transfers and as a network share for private
files. If a home directory is already defined it will be shown. Choose a volume and
click Save. If any files exist in a previous Home directory they will be moved to the
new location.
Change Current Date and Time
Settings for time zone, date and time. Set time zone to a listed city nearby in the
same time zone.
Update Device/Workgroup Names
Settings for the NAS unit's network name and Windows workgroup. Default setting
is ADDNAS joined to WORKGROUP. Setting the workgroup name on all devices
on the same network to match is strongly recommended. The Device name is
present. Instructions on updating firmware are provided with the firmware
update.
Caution: All of the NAS unit's settings may be lost in the process of applying
firmware. Make sure to notify any and all users this will be done to prevent data
loss and use the Backup Internal System Configuration Information utility before
proceeding.
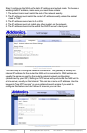
The Sharing Tab
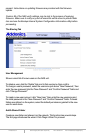
User Management
Shows current list of known users on the NAS unit.
To delete a user, click the “Delete” link next to that username, then confirm.
To change a user's password, select the username just above “New Password,” then
enter the new password into the “New Password” and “Confirm Password” fields and
click “Change Password.”
To create a new user account, click “New User,” then enter the new username and
the initial password in the “New Password” and “Confirm Password” fields. If shared
folders are defined on the system, select the default permissions granted to the new
user for each share.
Add A Shared Folder
Creates a new folder and shares it on the network. This function has several steps.
The first page introduces the wizard. Click “Begin Wizard” to proceed.