


www.addonics.com Technical Support (M-F 8:30am - 6:00pm PST) Phone: 408-453-6212 Email: www.addonics.com/support/query/
Installation
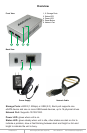
Network Connection
The NAS unit is factory configured for dynamic IP addressing (DHCP client).
Connect the unit to a network (router or switch) where DHCP is supported.
Static IP may be assigned later after initial setup.
Storage
The NAS unit does not support FIS switching for port multipliers, therefore any
eSATA devices must be a single drive or a RAID array. Also, through the use of
USB hubs, up to a total of 16 physical storage devices may be connected, also
counting any eSATA drives. One SATA port multiplier in JBOD mode may be
connected using USB; however, with more than one such port multiplier
connected only one will function – others will not be recognized at all.
Each physical unit may be formatted with up to 4 individual partitions using a
Master Boot Record (MBR), or up to 15 individual partitions using a GUID
Partition Table (GPT). Supported file systems are: FAT32, ext2, ext3, ext4, XFS,
and NTFS. The NAS unit will by far provide the best performance when using
the XFS file system.
NOTE: Initializing a drive with MBR is limited to drives less than 2TB in capacity with up to 4
partitions total. For drives greater than 2TB in capacity or if more than 4 partitions are desired, the
drive must be initialized using a GPT boot record.
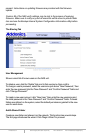
The NAS Unit Boot Process
Upon connecting power the unit, the status LED will blink at first between bright
and dim, then remain dark for a few moments, then begin to blink between
bright and dark for a while and finally settle down to glowing steadily. Once this
pattern is complete the unit is ready to communicate.
This process normally takes about a minute or less, but may take longer
depending on the complexity of the configuration, storage and LAN
connections. With the 240 possible file systems, booting may take several
minutes or longer.
Resetting the NAS
Should a problem arise with the NAS unit or its configuration, the unit may be
reset simply by turning the unit off, then back on after a few moments. If this
doesn't clear the problem, the unit may be returned to its factory configuration
by gently pressing and holding the reset button between the power and LAN
connectors until the Status LED blinks slowly, then rapidly. After releasing the
Reset button while blinking slowly there will be no changes. After releasing the
button once the Status LED blinks rapidly, the Status LED will continue to blink
for a while, and may possibly glow steadily for a while as well. Eventually it will
begin the boot process, beginning with blinking between bright and dim. Once
the boot process is complete and the LED is glowing steadily again, all settings
will have been cleared and the unit is ready to communicate with all settings
reset to the factory default – including the network and device name settings.
If the process appears to become stuck or takes too long to complete, you can
try disconnecting power, then reconnect and after the Status LED blinks bright
and dark a few times, try the Reset button again.
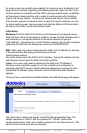
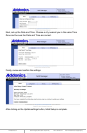
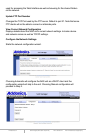
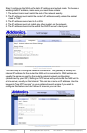
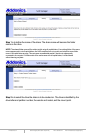
Initial Setup
Windows: All of the NAS unit's functions and features are configured using a
Web Interface. Once the hardware is installed, access the Web Interface with a
web browser on a computer attached to the same network by typing in
“http://addnas” - this will work on most Windows systems. Be sure the computer
accessing the NAS has the Workgroup name set to WORKGROUP.
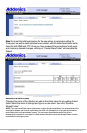
MAC: Mac users may need to determine the NAS unit's IP address by opening
a Terminal window and typing the following command:
smbutil lookup addnas
This utility should return the NAS unit's IP address. Typing this address into the
web browser should open the NAS unit's Web Interface.
Linux: Linux users may need to determine the NAS unit's IP address if
Windows name resolution support is not fully installed and configured, by
examining the DHCP server's clients table and attempting to connect to each
unidentified IP address using a browser until the NAS unit's Web Interface
appears.