


4 AT-PWR01 & AT-PWR01-80
C613-04049-01 REV B
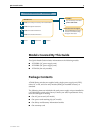
For power supply units purchased separately, the following items are included
with each unit.
■ One power supply unit (AC or DC)
■ One AC power cord (AC model)
■ One power cord retaining clip (AC model)
■ One AT-PWR01 Quick Install Guide
■ One Safety and Statutory Information booklet
■ One warranty card
Installing A Power Supply Unit (PSU)
All AC and DC versions of this equipment must be earthed.
Follow these steps to install a PSU:
1. Read the safety information
The AT-PWR01 Safety and Statutory Information booklet includes all relevant
safety information. A copy of this booklet is supplied with the PSU, and
can also be downloaded from
www.alliedtelesyn.co.nz/support/at8900/
.
2. Gather the tools and equipment you will need
To loosen or secure the PSU’s mounting screws you will need a Phillips #2
screwdriver.
To install a DC version of the PSU, you will need an appropriate DC power
source, DC supply cable, ring connectors, and a crimp tool.
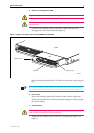
3. Unpack the PSU
In an antistatic environment, remove the PSU from its packing material. Be
sure to observe ESD precautions.
Verify the package contents. If any items are damaged or missing, contact
your sales representative.
Do not attempt to install a power supply unit without observing correct
antistatic procedures. Failure to do so may damage the power supply unit or
switch. If you are unsure what the correct procedures are, contact your
authorised Allied Telesyn distributor or reseller.
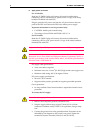
4. For AC models only, fit the power cord retaining clip
There is one retaining clip for the AC power inlet on the PSU.